Classic Homemade White Bread
Bake the best homemade white bread with my simple recipe! Perfect for sandwiches or toast. Discover tips for fluffy, delicious bread inside!

- Let’s Talk About White Bread: Memories, and Magic in the Kitchen
- The Heart of Homemade White Bread
- Why You Should Bake This Bread
- Let’s Get Baking!
- The Essential Ingredients Guide to Homemade White Bread
- Get Ready to Bake: Mastering Professional Cooking Techniques
- Pro Tips & Secrets for Perfect White Bread
- Perfect Presentation: Make it Look Good!
- Storage & Make-Ahead Tips
- Creative Variations to Keep Things Fresh
- Complete Nutrition Guide: What’s in that Slice?
- Wrapping it All Up
- Frequently Asked Questions
- Recipe Card
Let’s Talk About White Bread: Memories, and Magic in the Kitchen
Oh my gosh, where do i even begin? you know that feeling when the smell of freshly baked white bread wafts through your house, and it feels like a warm hug on a chilly day? that’s what homemade white bread means to me.
I remember the first time i tried making it as a kid. i was probably knee-high to a grasshopper, and i was convinced i’d become the next great baker.
Spoiler alert: flour ended up everywhere, and my dog had a field day with the leftovers.
But hey, that’s how the magic begins, right? just a little mess, a few giggles, and your kitchen turning into a mini bakery! the beauty of homemade bread is not just the end product; it's also about the experience.
Making mennonite bread recipes or simply following a simple bread recipe with 4 ingredients , it’s all about crafting something delicious and bonding with those around us.
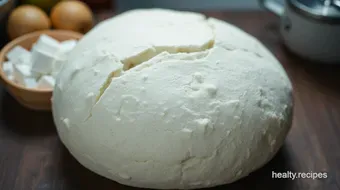
The Heart of Homemade White Bread
So, what’s the deal with this classic homemade white bread ? well, it has a rich history. our ancestors used basic baking practices, often making bread from ingredients they could gather easily.
Fast forward to now, and it’s still a staple in american homes. whether it’s for sandwiches, french toast, or just slathering butter on a slice for breakfast, its relevance hasn't wavered.
Now, let’s break it down a bit. this recipe is labeled medium for difficulty. sure, there’s some kneading and proofing involved, but don't let that scare you! you don’t have to be a pro to whip up this slice of heavenly goodness.
If i can do it, so can you! the total time? expect to spend about 2 hours and 10 minutes from start to finish.
Trust me, it’s totally worth it! and again, it yields a nice 12 slices , which is perfect for a small family or saving for the week.
Why You Should Bake This Bread
Now, I can hear you asking, “What’s in it for me?” Let me tell you, there are some solid benefits to baking this white bread.
First off, it’s downright delicious and has that wonderful fluffiness that just can’t be replicated by store-bought loaves. and let’s talk health for a sec—it offers some essential nutrients and fills you up without empty calories.
Whether you’re serving it for family get-togethers, cozy dinners, or even for those friday night get-togethers with friends, it’s a great choice! plus, it’s budget-friendly compared to bread videos recipes that often call for fancy ingredients.
Who needs that when you can go for easy bread recipes no yeast and still enjoy a killer loaf?
And let’s not forget the ultimate advantage: making it from scratch lets you control those ingredients. want a light bread recipe ? adjust the butter! short on milk? no problem, it can be a bread no milk recipe.
You get to customize it the way you like! how cool is that?
Let’s Get Baking!
Alright, buckle up as we head into the kitchen. making homemade white bread is a delicious adventure that awaits you.
If i’ve piqued your interest, the next step is gathering those simple ingredients. they’re likely sitting in your pantry, just waiting to be part of your next baking masterpiece.
So, put on your apron, preheat that oven, and let’s roll up our sleeves. trust me, the payoff is more than just a loaf of bread; it’s the memories, the laughter, and the fact that you made something wonderful with your own two hands.
Can’t wait to share the ingredient list with you!
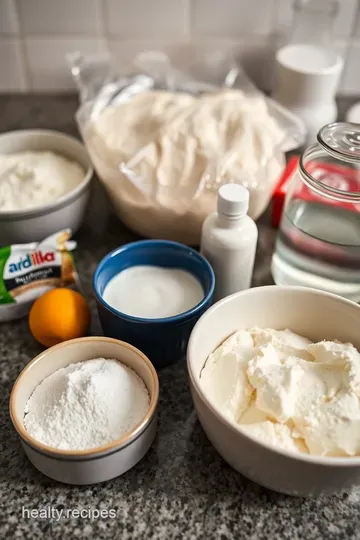
The Essential Ingredients Guide to Homemade White Bread
Homemade white bread? oh my gosh, nothing compares! the smell wafting through your kitchen? absolute heaven. let’s dive into the essential ingredients you’ll need, along with some nifty tips to make sure your loaf turns out fluffy and golden.
Premium Core Components
First things first, what goes into your bread? detailed measurements are key, whether you're a fan of the traditional us system or you prefer going metric.
For our classic white bread, you’ll need 4 cups (500g) of all-purpose flour . trust me; it’s the base of all your bread-making dreams!
Quality indicators are super important. look for flour that’s soft and fluffy. if it feels coarse or looks discolored, it’s time to toss it.
And let’s talk storage guidelines . flour can last up to a year if stored in a cool, dry spot. but if you want to keep it even fresher, throw it in the fridge!
To ensure your freshness , always check the expiration date and give it a little whiff. If the flour smells off, no bueno!
Signature Seasoning Blend
Now, let’s spice things up a bit! seasoning elevates your bread game. a typical mix might include salt (about 1 tablespoon/10g ) and granulated sugar (just 2 tablespoons/25g ).
These aren't just for flavor; they help the yeast thrive!
When it comes to herbs, think about adding dried rosemary or thyme for that extra touch. You could even create a signature blend that reflects your personality. Just for fun!
Smart Substitutions
We all have those “uh-oh” moments in the kitchen. maybe you’re missing yeast or you realize you’re out of sugar.
No sweat! common alternatives include using honey instead of granulated sugar or olive oil in place of butter. you’d be surprised how good things can taste when you get a little creative with your emergency replacements .
If you want to keep it dairy-free, swap out with a plant-based butter. And hey, if you don’t have milk, just roll with water!
Kitchen Equipment Essentials
Alright, let’s talk kitchen gear . You don’t need a fancy bread machine. A large mixing bowl , a wooden spoon , and a 9x5-inch loaf pan are your best friends.
Kneading can be a workout, folks! if you’ve got a countertop or cutting board, that’ll be perfect for working that dough.
As for prep? you’ll also want a clean kitchen towel or plastic wrap for the proofing process.
And let’s not forget! A wire cooling rack is essential for letting the bread cool properly. Nobody wants soggy bread.
Putting It All Together
Now, you might be wondering how all this ties in with bubbling loaves of homemade white bread . well, it’s the heart of this journey! gathering the right ingredients, spices, and tools saves you from kitchen chaos and sets you up for success.
Plus, you can whip out those mennonite bread recipes you’ve always wanted to try or even check out bread videos recipes for more inspiration.
Homemaking bread isn’t just about the end result; it’s about the adventure, the aroma lingering, and the stories you’ll share over toast.
So, are you ready to get mixing and kneading your way to a fabulous classic white bread?
Let’s move on to the step-by-step instructions. Grab your gear, roll up those sleeves, and let’s get this bread!

Get Ready to Bake: Mastering Professional Cooking Techniques
When it comes to baking, nothing says “home sweet home” quite like the smell of freshly baked white bread wafting through the kitchen.
Before you hustle over to whip up your new favorite loaf, let’s take a moment and dive into some essential professional cooking methods.
Trust me, you’ll want to add these tricks up your sleeve.
Essential Preparation Steps
First up, mise en place — that fancy french term that means “everything in its place.” seriously, before you even think about turning on the oven, gather all your ingredients and tools.
This makes your life a whole lot easier. i once tried to bake without making sure i had everything first.
Let’s just say, i ended up making a “mystery bread” instead of classic white bread.
Time management is key, my friends. baking bread isn’t just about mixing and throwing it in the oven. you’ve gotta keep an eye on resting and proofing times.
Setting timers can be a lifesaver here.
And let’s not forget organization. Keep your area tidy — you don’t want flour flying everywhere. Plus, it’s easier to find what you need without a treasure hunt!
Safety considerations are definitely a must. keep that workspace clean, and always remember — hot ovens are no joke! i’ve had a few burnt fingers in my day, and trust me, you want to avoid that.
Step-by-Step Process to Bread Mastery
Ready to whip up your own loaf of goodness? Here’s a step-by-step rundown of how to make classic white bread that even your grandma would approve of:
- Combine Dry Ingredients : In a bowl, whisk together 4 cups of all-purpose flour , 2 tbsp sugar , 1 tbsp salt , and 2 tsp instant yeast .
- Add Wet Ingredients : Pour in 1.5 cups warm water (about 110° F ) and 3 tbsp melted butter . Stir until it looks shaggy.
- Knead the Dough : Time to roll up those sleeves! Knead for about 8- 10 minutes until it’s smooth and elastic.
- First Proof : Place the dough in a greased bowl, cover it, and let it rise for about 1 hour or until it doubles in size.
- Shape the Dough : Give it a light punch to deflate, shape it into a rectangle, and roll it into a log.
- Second Proof : Pop it into a greased loaf pan, cover it, and let it rise again for 30- 40 minutes .
- Preheat Oven : While waiting, preheat your oven to 375° F .
- Bake the Bread : Bake for 25- 30 minutes until golden and it sounds hollow when tapped.
- Cool : Let it settle in the pan for 10 minutes , then transfer to a cooling rack.
- Slice and Enjoy : Wait for it to cool completely before slicing. Trust me, the perfect toast starts here!
Expert Techniques for the Perfect Loaf
Okay, let’s get a little fancier.
First, check your yeast . If it’s expired, you’re headed for bread fail. Always use fresh yeast for that fluffy texture.
Kneading may seem simple, but it’s crucial to develop that gluten. Think of it as a workout for your dough. Use the “push and fold” technique for best results.
Timing precision matters, too. Bake until that crust is golden brown and firm to the touch for the best results.
If you're going for a more gourmet loaf, consider adding some herbs or seeds to spice things up. Sometimes, I’ll throw in sesame seeds for an extra crunch.
Success Strategies That Work
Alright, let’s chat about those little slip-ups we all encounter. ever forget to check your oven’s temperature? yeah, it's super common, and it can turn your bread into a brick.
Keep a kitchen thermometer handy to make sure you're spot on!
Also, one common mistake is cutting into the bread too soon. don’t do it!! give it time to cool to keep that beautiful slice structure.
And as for the crust, if it’s too hard, try wrapping it in a kitchen towel right after baking to soften it up.
Use these quality assurance tips to check for doneness. It should sound hollow when tapped, and the crust should be appealingly golden.
Wrapping It All Up
With these techniques in your pocket, you’ll be on your way to baking the most tender, mouth-watering white bread . want an easy start? just remember, simple bread recipes can yield remarkable results.
Try not to stress; enjoy the process, and make some mess!
Tired of store-bought bread? try these mennonite bread recipes or snag a few bread videos recipes online for extra inspiration.
You’ll soon find your favorites, maybe even some easy bread recipes no yeast options for those lazy sundays.
Stay tuned for the next section where I'll delve into some additional information — you won’t want to miss it!

Pro Tips & Secrets for Perfect White Bread
Alright, bakers! Let’s dive into some pro tips that’ll elevate your homemade white bread game to a whole new level. Seriously, don’t skip these!
First off, warm water is your best friend . you want it just right—not boiling, but cozy enough to give your yeast that gentle nudge.
If it’s too hot, well, you might as well be sending that yeast on a one-way trip to yeast heaven.
Trust me, you want it around 110° f/ 43° c .
For the best texture, knead well ! this is the part where bread starts to take shape. you're aiming for that smooth, elastic feel—like a bread hug.
It usually takes about 8- 10 minutes of solid kneading. pro tip: if you’re feeling fancy, go for a little double kneading—just knead it, rest it, and knead a bit more.
It really makes a difference.
Let your bread rise in a warm environment . if your kitchen is chilly, create a cozy proofing spot by sticking it in the oven with just the light on.
Don’t forget to cover it! a clean kitchen towel will do the trick here.
Perfect Presentation: Make it Look Good!
You know what they say: we eat with our eyes first ! when it comes to white bread, presentation matters.
After you slice it up, consider serving it on a rustic wooden board or in a nice basket.
Garnish your loaf with a sprinkle of fresh parsley or rosemary on top—looks classy, right? colorful spreads also help! a bright jam or colorful butter can really steal the show.
Ever seen that beautiful sunrise peach jam next to a slice of fresh bread? talk about instagram-worthy!
One last tip: when you slice, use a serrated knife . It helps keep those slices from squishing down. And we want each slice to look fluffy and inviting, right?
Storage & Make-Ahead Tips
Let’s talk about keeping that homemade white bread fresh. you can store your bread at room temperature in a sealed container or a plastic bag for about 3 days.
But if you wanna keep it around longer, toss it in the freezer. just wrap it up well—drama-free, please!
If you decide to freeze it, just slice it before freezing. That way, you can pull out a slice or two without having to thaw the whole loaf. Genius, right?
When it’s time to enjoy that frozen goodness, just let it sit on the counter for about 15- 20 minutes or pop it in the toaster.
It comes out so good; you might think it was just baked!
Creative Variations to Keep Things Fresh
Stuck in a bread rut? No problem! Let’s get creative.
- Flavor it up : Toss in some garlic powder or herbs like rosemary for a twist.
- Want something a little more exotic? Try mixing in sun-dried tomatoes or olives for a Mediterranean flare—yum!
- Feeling festive? Seasonal twists with pumpkin or nutmeg in the fall can really make your bread stand out.
And hey, if you're catering to dietary needs, there are easy adaptations ! you can turn this into an easy bread recipe with no yeast by using baking powder instead.
Just take out the yeast, add in double the baking powder, and maybe sprinkle in some cream of tartar.
Complete Nutrition Guide: What’s in that Slice?
A slice of homemade white bread is about 80 calories —not too shabby for a comfort food! it packs a solid 2g of protein and 1g of fat .
That’s a good base for topping it with avocado or peanut butter.
In terms of health benefits, it's low in fiber, but hey, it's all about balance, right? pair a slice of white bread with some protein or healthy fats to create a filling snack.
When serving, keep it manageable! About one slice as a snack or two for a meal is a safe bet.
Wrapping it All Up
So there you have it, folks! Homemade white bread is not just about following a simple recipe. It’s about those little tricks and tweaks that transform a basic loaf into a masterpiece.
Whether it’s shaping, storing, or adding your own twist, there’s so much joy in making this classic favorite. so roll up those sleeves, grab your ingredients, and let the dough do the magic.
You’ll be creating delicious memories in no time!
Let’s face it: your kitchen is calling out for that divine smell of freshly baked bread. Give it a go and share your foodie tales—trust me, you’re gonna love it! Happy baking!
Frequently Asked Questions
What makes homemade white bread different from store-bought?
Homemade white bread is often fresher and lacks the preservatives found in many store-bought loaves. It has a delightful aroma and a soft, fluffy texture that you just can’t replicate with packaged bread. Plus, there's nothing quite like the satisfaction of making it yourself—it's like putting on the perfect pair of wellies on a rainy day!
How can I tell when my white bread dough has risen enough?
Your dough is ready for shaping when it has doubled in size, which usually takes about an hour in a warm place. A good test is to gently poke the dough; if the indentation stays, it’s ready. Remember, patience is key—much like waiting for your favourite tea to brew!
What should I do if my white bread dough isn’t rising?
If your dough isn’t rising, it could be due to cold temperatures or inactive yeast. Try moving it to a warmer spot or turning on your oven for a few minutes, then turning it off and placing the dough in there. Think of it as a lovely cozy mug of hot chocolate on a chilly evening!
How can I store my homemade white bread for maximum freshness?
Once completely cooled, wrap your bread in plastic wrap or foil and store it at room temperature for up to 3 days. For longer storage, slice it and freeze it in an airtight bag—just pop slices in the toaster when you fancy a bit of toast! It's like having a trusty friend ready to serve up a slice of delight anytime.
Can I make any variations to the classic white bread recipe?
Absolutely! You can add herbs like rosemary or thyme for a fragrant twist, or sprinkle in seeds such as sesame or poppy for texture. If you're feeling adventurous, substituting milk for water can yield a softer loaf. Think of it like adding a twist to a classic British shepherd's pie—always room for creativity!
Is homemade white bread nutritious?
While homemade white bread is a comforting treat, it’s not as high in fiber as whole grain bread. However, you can enhance its nutritional profile by adding seeds or using whole wheat flour for part of the all-purpose flour. Just remember, everything in moderation—enjoying a slice with your afternoon cuppa makes it all worthwhile!

Classic Homemade White Bread Card
⚖️ Ingredients:
- 4 cups (500g) all-purpose flour
- 2 tablespoons (25g) granulated sugar
- 1 tablespoon (10g) salt
- 2 teaspoons (7g) instant yeast
- 1 ½ cups (360ml) warm water (about 110°F/43°C)
- 3 tablespoons (45ml) unsalted butter, melted
🥄 Instructions:
- Step 1: In a large bowl, whisk together flour, sugar, salt, and instant yeast.
- Step 2: Pour in warm water and melted butter; stir until a shaggy dough forms.
- Step 3: Transfer the dough to a floured surface and knead for about 8-10 minutes until smooth and elastic.
- Step 4: Place the dough in a greased bowl, cover it, and let it rise in a warm place for about 1 hour or until doubled in size.
- Step 5: Punch down the risen dough, shape it into a rectangle, and roll it tightly into a loaf.
- Step 6: Place the shaped loaf in a greased loaf pan, cover it, and let it rise for another 30-40 minutes.
- Step 7: Set the oven to 375°F (190°C) during the second proof.
- Step 8: Bake for 25-30 minutes until the top is golden and the loaf sounds hollow when tapped.
- Step 9: Remove from the oven, let cool in the pan for 10 minutes, then transfer to a cooling rack.
- Step 10: Wait for the bread to cool completely before slicing; serve plain or toasted!
Previous Recipe: Liquid Gold: How to Make Clarified Butter for Irresistible Dishes
Next Recipe: My Go-To Green Smoothie: A Refreshing Start to Your Day