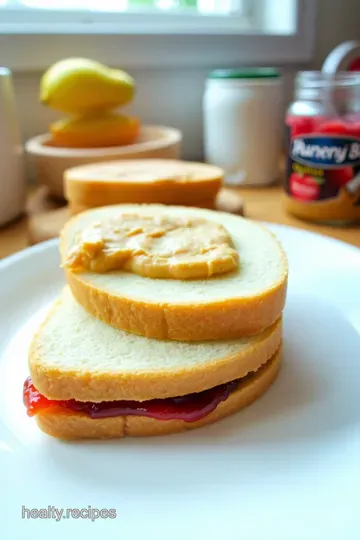
Homemade Uncrustables: Peanut Butter & Jelly Sandwiches
Dive into my delightful uncrustables peanut butter and jelly! A fun, easy way to make high-calorie toddler snacks everyone will love!

Diving into the Joy of Homemade Uncrustables
Oh my gosh, have you ever found yourself longing for the good ol’ days of school lunch? you know the kind, where the bell rings, and you dive into a lunchbox packed with goodies.
I mean, what screams childhood more than a classic peanut butter and jelly sandwich ? let’s take a trip down memory lane with homemade uncrustables: peanut butter & jelly sandwiches .
These little bites of nostalgia are not just tasty; they hold the magic of simpler times in each bite.
Growing up, i remember my mom making my lunch, and i always squealed with joy when she packed those neat little sandwiches.
Did you know that uncrustables peanut butter and jelly were first introduced by smucker’s in 1990? yeah, it’s been around for a while, and they’re still super popular! in today's fast-paced world, these handy little sandwiches fit right into busy lifestyles—whether it's a lunchbox, a picnic, or a late-night snack.
Recipe Overview: A Quick Look Back and Forward
When we talk about homemade uncrustables , we're diving into a history lesson wrapped in bread. these tasty treats have roots in the 90s, but they have stood the test of time.
I mean, who wouldn’t love these in their lunch today? fast-forward to today, and they’re more relevant than ever, especially for parents looking for high-calorie toddler snacks or quick meals for themselves.
And let me be real with you—this recipe is as easy as pie. with only 15 minutes of prep time and zero cooking (yes, you read that right!), it's a breeze even for kitchen newbies.
Plus, it yields about 8 uncrustables —ideal for meal prepping or just satisfying those mid-day cravings. cost-wise? it's super budget-friendly too.
You can whip up a batch for under ten bucks, depending on your fills—that's a win in my book!
Why You’ll Love These Uncrustables
Now, let’s chat about the benefits of these little delights. first off, they pack a clear nutritional punch . each sandwich gives you a nice dose of protein from the peanut butter (hello, high protein high fiber ).
Throw in some whole grain bread, and you’ve got yourself a snack that checks off quite a few boxes on the health checklist.
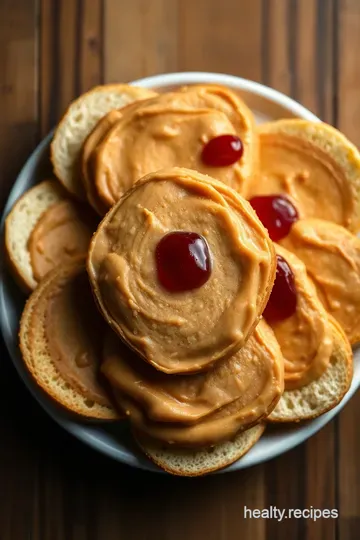
Plus, they are customizable! fill them with whatever makes your taste buds sing—think of the diy uncrustables fillings ! from honey to almond butter, the sky's the limit.
These little numbers are perfect for birthday parties, tea gatherings, or just satisfying that snack attack. trust me, if you serve these at a baby shower or a kids’ party, they'll be a hit.
They have that effortless charm that makes them stand out among the usual cupcakes and chips. don't get me started on the joy of seeing kids devour them like they’re gourmet treats!
Not to mention—these sandwiches freeze like a dream. make a batch of uncrustables recipes , wrap ‘em up, and voilà! you have a go-to snack ready whenever hunger strikes.
Just pop them out when you want, and you’re good to go.
Let’s Get to the Good Stuff: Ingredients
Ready to dive into making these scrumptious homemade uncrustables ? before you start grabbing your rolling pin, let’s talk ingredients.
Trust me, you’ll want to know what to gather before the fun begins!

Essential Ingredients Guide for Homemade Uncrustables
There's something so nostalgic about biting into a peanut butter and jelly sandwich, right? especially when it’s those uncrustables peanut butter and jelly that we all love.
If you're diving into the kitchen to whip up some homemade uncrustables (and trust me, you’ll want to), having a solid understanding of your essential ingredients is key.
Let’s break it down!
Premium Core Components
First off, let's talk about premium core components . When you're whipping up these sandwiches, quality matters.
-
Bread : Aim for fresh, soft white bread . It should be spongy, and if it’s been sleeping in your pantry for weeks, just don't.
- Storage tip: Keep bread in a cool, dry place and try to use it within 5-7 days .
-
Peanut Butter : Go for creamy peanut butter —it's easier to spread and unleash that nostalgic flavor.
- Quality check: If it’s oily on top, that’s a sign of natural peanut butter; give it a good stir.
- Shelf life: 6-12 months unopened, according to the jar.
- Store in a cool cupboard, but if you like it fresh, consider refrigeration.
-
Jelly : Sweet strawberry, tangy grape—whatever floats your boat! Just check the sugar content.
- A good jelly will have real fruit listed as the first ingredient.
- Once opened, it’ll last about 6-12 months in the fridge.
Now that you know what to pick, let’s save that sweetness for later by learning how to select and store properly.
For freshness, always give a little sniff test. if it smells off, it probably is.
Signature Seasoning Blend
Moving onto the fun part—your signature seasoning blend . Okay, so we don’t typically season peanut butter and jelly sandwiches, but you can spice things up if you’re feeling adventurous.
- Add-ins : Consider cinnamon or a sprinkle of sea salt to enhance the flavors.
- Herbs for Fun : Got fresh mint or basil? Throw it in with your jam for a unique twist—and trust me, it’s surprisingly delightful!
Smart Substitutions
Life happens, and sometimes you just don’t have the perfect ingredients on hand. No panic! Here are some smart substitutions :
- No jelly? Grab some honey or use sliced bananas—trust me, that combo is a game changer!
- Avoiding gluten? Use gluten-free bread ; it works just as well in a pinch.
For all the health-conscious peeps out there, switch to natural nut butters; you know, the kind with just nuts and salt—this gives you that high-protein high-fiber boost that parents love.
Kitchen Equipment Essentials
Alright, moving on to some kitchen equipment essentials you won’t want to skip:
- Round Cookie Cutter : This is your MVP for shaping those uncrustables! A glass will do in a pinch but don’t go too big.
- Fork : Not just for eating! It’ll help seal the edges like a pro.
- Rolling Pin : If you’re feeling fancy, flatten out the bread for some serious gourmet vibes.
Storage solutions? Grab some plastic wrap or sandwich bags to keep your creations fresh and ready to go.
In Conclusion
As you prepare to tackle your very own homemade uncrustables , keep this essential ingredients guide close by. cooking should be fun—and if you mess up a little, hey, who cares? i always say cooking is part science, part magic.
Trust your gut, and make it your own!
Now that you’re prepped, let’s dive right into making those awesome sandwiches. I can’t wait for you to taste that nostalgic goodness. Who’s ready to dig in?
Mastering the Art of Homemade Uncrustables: Peanut Butter & Jelly Sandwiches
Alright, folks! let's chat about one of the easiest joys in life— homemade uncrustables: peanut butter & jelly sandwiches . seriously, who can resist those little pockets of happiness? they remind us of school lunches and lazy summers, don’t they? so, grab your apron and let’s roll up our sleeves.
Essential Preparation Steps
Before diving in, let’s talk mise en place . it’s a fancy french term, but it just means getting your stuff ready before you start cooking.
Gather your ingredients— 8 slices of fresh, soft white bread , 1 cup of creamy peanut butter , and 1 cup of jelly .
You want everything within arm's reach, trust me!
Time management? Oh, it’s key! This whole shebang should take you about 15 minutes tops . Set a timer—it's like cooking meets reality TV.
Oh, and please—safety first. If you’re using a knife, watch those fingers! We want to enjoy the sandwiches, not a trip to the ER.
Step-by-Step Process
Let’s lay it out nice and simple.
-
Flatten the bread : take a slice of bread, put it on a clean surface, and roll it out a bit.
This isn’t essential, but a little flattening makes them super easy to work with.
-
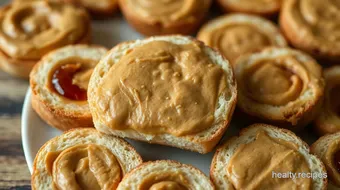
Spread the fillings : grab a spoon and spread about 2 tablespoons of peanut butter on one slice and 2 tablespoons of jelly on another.
Going wild with the peanut butter is never a bad idea—live your best life!
-
Piece It Together : Sandwich them. Jelly side down, of course. Like a cozy pillow fight!
-
Cut and Seal : Use a round cookie cutter to cut out your sandwiches. No crusts allowed! Press the edges with a fork to seal them up tight.
-
Repeat : Do this with all your slices until you have a stack of unfussy goodness.
-
Store : wrap each uncrustable tight in plastic wrap or toss them in sandwich bags. they freeze well, so feel free to prep ahead.
You’ll save yourself some serious time during busy weekdays.
Make sure to keep an eye on temperature control if you’re planning to freeze these bad boys. Keep your freezer at 0° F to maintain freshness.
Expert Techniques
Now let’s sprinkle in some expert flair!
-
Quality Checkpoints : Always use fresh bread —it makes a difference. Stale bread will ruin the magic!
-
Score the Edges : Press down firmly around the edges to create that nice, tight seal. No one likes a soggy sandwich, right?
-
Troubleshooting : If your sandwiches start oozing peanut butter? Before sealing, give it a light press to spread the filling more evenly.
Success Strategies
So you’ve made them. What’s next?
-
Avoid common mistakes : Too much filling can lead to leaks. Trust me, it’s a tragedy! Keep it to about 2 tablespoons each.
-
Quality assurance tips : Taste test! If a little ooze happens during sealing, just dab it up and enjoy the spoils. Who doesn’t love a sneak peek?
-
Make-ahead options : These Uncrustables are perfect for batch cooking. Freeze them in sets of four, and you’ve got a week’s worth of quick, high-calorie toddler snacks ready to go.
Fun Variations
Don’t stop at traditional peanut butter and jelly! try out diy uncrustables fillings like nutella with banana or almond butter with raspberry jam for a twist.
Let’s face it, it’s all about making those high-protein, high-fiber combos that keep everyone happy!
And if you’re feeling fancy, these make awesome tea party sandwiches —everyone loves cute little bites!
So, set up a mini picnic, grab your uncrustables, and enjoy them under the sun. speaking of which, stay tuned for additional information on how to vibe with these timeless treats in all kinds of scenarios.
Discovering the Joys of Homemade Uncrustables: Peanut Butter & Jelly Sandwiches
So, i’ve been all about that nostalgia lately—anyone else feel me? remember those sunny afternoons spent munching on uncrustables peanut butter and jelly sandwiches? well, thank the heavens for this diy revival! homemade uncrustables are like a trip down memory lane, but with a bit more personal flair.
Let’s dive into some extra info to keep this sandwich classic from drying out your creativity.
Pro Tips & Secrets
First things first, let’s talk about my favorite tips. use fresh bread for the best experience. go for that soft, pillowy white bread—it makes all the difference! when it comes to peanut butter, i swear by creamy for a smoother bite, but chunky? that’s cool too! don't forget to seal up those edges with a good ol’ fork—trust me, no one likes a leaky uncrustable.
And here’s a time-saver: if you’ve got kids (or just a wild imagination), get them involved! let them pick their favorite diy uncrustables fillings .
Jelly? nutella? honey? the world is your oyster, folks! if you’re in a rush, whip up a batch over the weekend and freeze ‘em.
You’ll have quick lunches ready to go for those busy school days or spontaneous picnics.
Perfect Presentation
Now, let’s jazz it up! let’s face it—sometimes it’s all about the visual appeal. seal those edges neatly and cut them into fun shapes! stars, hearts, or simple rounds—get creative! a little sprinkle of powdered sugar on top can take this to a new level, especially if you’re serving these at a kid’s party or a tea party .
Remember, color combinations matter. pair your uncrustables with vibrant fruit like strawberries or blueberries for that instagram-ready snack.
Storage & Make-Ahead
Let’s get down to the nitty-gritty of storage. here’s the scoop: wrap them tightly in plastic wrap or stash them in sandwich bags.
They’ll keep in the fridge for about three days, but if you’ve gone the freezing route, they’ll last for about a month.
To reheat these bad boys, just let them thaw in the fridge overnight, or pop them in the microwave for about 10-15 seconds.
No one wants to bite into a frozen chunk of bread, am i right?
Creative Variations
Feeling adventurous? mix it up with some high protein high fiber options. swap out traditional peanut butter for healthy homemade peanut butter or try almond butter if you’re feeling fancy.
Add some flavored adaptations by switching up those jams too! the possibilities are endless: chocolate-hazelnut spread with banana slices, or why not a savory twist with cream cheese and cucumber for those nostalgic lunchbox vibes?
Complete Nutrition Guide
Alright, let’s take a sec to talk about the nutritional side of things. you’ll be stoked to know that one of these delightful sandwiches clocks in around 200 calories , but it’s not all bad news—it boasts about 6 grams of protein too! for a kiddo after-school snack or a quick pick-me-up, it’s a solid choice.
Just watch those portions; moderation is key, especially with those high-calorie toddler snacks .
Wrapping It Up
So, there you have it! homemade uncrustables are not just a nod to our childhood; they’re a versatile, fun addition to any meal plan.
Whether you’re prepping for picky eaters or looking for some creative culinary play, these sandwiches do it all. and honestly, who doesn’t love a classic uncrustables recipe ? so, grab your ingredients, gather the crew, let your imagination run wild, and dive into this delicious project.
Happy sandwich-making, friends!
Frequently Asked Questions
What are Uncrustables peanut butter and jelly sandwiches?
Uncrustables peanut butter and jelly sandwiches are pre-made sandwiches featuring a delicious filling of peanut butter and jelly sealed within soft bread. They are a nostalgic treat that many of us remember from our school lunches, and now you can make them at home with ease!
Can I make Uncrustables peanut butter and jelly sandwiches in advance?
Absolutely! These sandwiches are perfect for making ahead of time. You can store them in plastic wrap or sandwich bags and freeze them. They maintain their taste and texture, making them an ideal quick lunch option for those busy days.
What types of bread work best for homemade Uncrustables?
The best choice is soft and fresh white bread, as it seals well and offers a classic taste. However, you can also experiment with whole grain or gluten-free bread if you prefer healthier options or need to cater to dietary restrictions.
Can I use different fillings besides peanut butter and jelly?
Definitely! Feel free to get creative with your fillings. Alternatives like Nutella, almond butter, or even cream cheese with fruit preserves can add a fun twist. Just make sure to spread the fillings evenly to keep them from leaking!
How do I store Uncrustables peanut butter and jelly sandwiches for freshness?
To keep your Uncrustables fresh, wrap each sandwich tightly in plastic wrap or store them in airtight sandwich bags. They can stay in the fridge for about 3 days or be frozen for up to a month. Just remember to let them thaw before serving!
What are some healthy variations for Uncrustables?
If you're looking for healthier options, consider using whole grain bread, organic nut butters, and low-sugar or homemade jam. You could also sneak in slices of banana or strawberries to boost the nutrition while enhancing the flavour!

Homemade Uncrustables: Peanut Butter & Jelly Sandwiches Card
⚖️ Ingredients:
- 8 slices of white bread (preferably soft and fresh)
- 1 cup (240g) creamy peanut butter (or chunky, if preferred)
- 1 cup (240g) jelly or jam (flavor of your choice, e.g., grape, strawberry)
- Plastic wrap or sandwich bags
🥄 Instructions:
- Step 1: Assemble all ingredients and equipment needed for the sandwiches.
- Step 2: Place a slice of bread on a clean surface. Use a rolling pin to gently flatten it (optional).
- Step 3: Spread 2 tablespoons of peanut butter on one slice of bread. Spread 2 tablespoons of jelly on another slice.
- Step 4: Place the jelly-covered slice on top of the peanut butter slice, jelly side down.
- Step 5: Use a round cookie cutter or glass to cut out the sandwich, removing crusts and ensuring a secure seal.
- Step 6: Use a fork to press down the edges, sealing in the filling.
- Step 7: Repeat the process with remaining ingredients.
- Step 8: Wrap each Uncrustable tightly in plastic wrap or place in sandwich bags for later enjoyment.
Previous Recipe: Build Your Own Salad Bar Fridge: Quick & Tasty Ideas for Everyone
Next Recipe: Classic Vinaigrette: My Go-To Easy Dressing for Any Salad