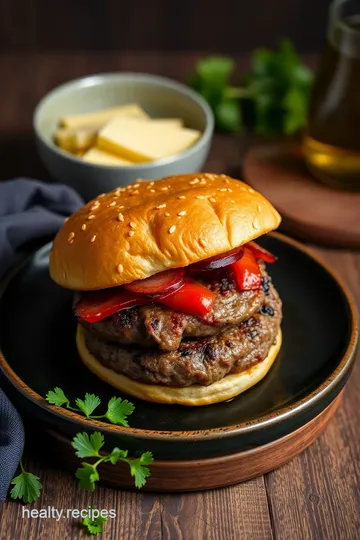
Broiled Beef Burgers: Quick & Juicy Perfection
Craving the best Broiled Beef Burgers - Quick & Juicy? Try my simple method for juicy, flavorful burgers perfect for your next BBQ. Get the recipe!

- Let's look into into Burger Bliss
- A Little Slice of Burger History
- Benefits of Burger Goodness
- As We Transition to Making These Bad Boys...
- The Essential Ingredients Guide for Broiled Beef Burgers - Quick & Juicy
- The Art of Broiled Beef Burgers: Quick & Juicy Perfection
- Pro Tips & Secrets to Burger Bliss
- Perfect Presentation That Wow’s the Crowd
- Storage & Make-Ahead Magic
- Creative Variations That Keep It Fresh
- Complete Nutrition Guide for Mindful Eating
- Frequently Asked Questions
- Recipe Card
Let's look into into Burger Bliss
Oh my gosh, let’s talk about the absolute magic of a good burger! i remember my first time hosting a backyard barbecue, i was so excited, but honestly, i ended up overcooking those poor patties.
They were drier than the sahara desert! but after a few trial and error moments, i landed on this broiled beef burgers - quick & juicy recipe that turned everything around.
Trust me, these beef patties are juicy, flavorful, and way easier than you think. so, if you’ve ever been in that “i just want a good burger” rut, stick around!
A Little Slice of Burger History
Burgers are such a classic american dish, aren't they? they’ve got roots stemming from german immigrants bringing their “frikadelle” to the u.
S. but it wasn't until world war ii that those bad boys found themselves in fast food joints everywhere! today, they’ve morphed into our backyard barbecues’ mvp.
This easy burger recipe comes together in under an hour, with the actual cooking taking just about 10 minutes. yeah, i know, sounds too good to be true, right?
In terms of cost, you can whip up four hearty burgers for about 10 bucks. Trust me, that’s a steal compared to those drive-thru meals that set you back way more—and what’s better than knowing you made those juicy patties yourself?
Benefits of Burger Goodness
Now, let’s dive into some of the key benefits of my killer burger recipe. first off, are you ready for a protein-packed punch? these juicy beef patties are not only filling but also rich in nutrients.
Each burger delivers about 25 grams of protein, keeping you satisfied for longer. plus, you can tweak it with your favorite toppings—think layers of fresh lettuce, crispy pickles, and that ooey-gooey cheese melting on top.
Also, this dish can be your go-to for special occasions ! whether it’s a relaxed friday night, a family gathering, or a cozy watch-party for the game, these burgers fit right in.
And the best part? you can customize them to cater to everyone’s taste buds. need it gluten-free? swap the buns for lettuce wraps!
Cooking beef to perfection is all about technique. the broiling method for meat ensures a juicy interior with a nice sear instead of messing with a griddle or outdoor grill.
So those worried about how to keep the moisture in? don’t sweat it! get yourself a meat thermometer, and bam! you’re on your way to restaurant-style burgers at home.
As We Transition to Making These Bad Boys...
I’ve given you the lowdown on why you need to add these flavorful ground beef recipes to your repertoire. with minimal fuss and maximum flavor, even beginner cooks can impress the crowd.
It’s the perfect blend of simplicity and satisfaction that every home cook dreams of.
Ready to jump into the ingredients? grab your notepad, because i’ll give you the rundown on all the goodies you need to get these broiled burgers cooking.
You're going to want to have this on repeat, trust me!

The Essential Ingredients Guide for Broiled Beef Burgers - Quick & Juicy
So, you’re ready to whip up those broiled beef burgers - quick & juicy , and let me tell ya, it’s gonna be a blast! but before we dive into the juicy details, let's chat about the essential ingredients you’ll need to create those perfectly juicy beef patties that’ll leave everyone begging for seconds.
Premium Core Components
When it comes to beef burgers, you gotta start with the right stuff.
-
Ground beef : go for 1 lb (450 g) of ground beef with about 80% lean . this is where the magic happens.
You want enough fat to keep things juicy but not so much that you’re swimming in grease.
-
Seasonings : you’ll need kosher salt (1 tsp) and black pepper (1/2 tsp) . simple stuff, but it makes a huge difference! toss in 1 tsp garlic powder and 1 tsp onion powder to amp up the flavor.
To add that little somethin’ special, mix in 1 tbsp worcestershire sauce . it's the real mvp.
Storage Wise : Keep your ground beef in the fridge for three to five days or freeze it for up to four months. Freshness is key!
Signature Seasoning Blend
No burger venture is complete without the right blend of spices.
-
Herbs & Spices : Besides the essentials, consider some fresh herbs, like parsley or cilantro, mixed into the patty. It adds a fresh kick, and who doesn’t love a colorful burger?
-
Flavor Enhancers : Worcestershire sauce isn’t just a decoration; it’s the umami bomb! Don't skip it!
Smart Substitutions
Sometimes life happens. No worries! There are always alternatives.
-
Dietary Mods : If you’re looking for a healthier option, ground turkey or chicken can do the trick. They’re a bit leaner but still delicious.
-
Emergency Replacements : No garlic powder? No problem! Use minced garlic instead (just be mindful of that strong flavor).
-
Seasonal Options : Depending on what's fresh and available, you can swap in herbs like basil in summer or rosemary in spring.
Kitchen Equipment Essentials
Now, let’s talk tools.
-
Must-have tools : grab yourself a broiler pan or a good ol’ baking sheet. you’ll also want a mixing bowl.
A meat thermometer is optional but super handy to nail that perfect doneness.
-
Prep tips : keep your hands and tools clean. prior to mixing, make sure the ground beef is as cold as it can be.
It helps the patties keep their shape when cooking.
-
Storage Solutions : Trust me, a good food container will save your life when it comes to storing leftover burgers.
Cooking Beef to Perfection
So, after gathering all your ingredients, you’re set to make some classic american burger style goodness. just remember to chill the burger patties for about 30 minutes before cooking so they firm up nicely.
Trust me; this makes all the difference for shaping those patties.
Check that temp with your meat thermometer! You want it at 160° F ( 71° C) for medium.
Oh, and pro tip—don’t squish your burgers while they cook! It releases all those juicy goodies. Nobody wants dry burgers, am I right?
As we jump into the step-by-step instructions , keep in mind that these burgers are not just for dinner. they’re a crowd-pleaser for backyard barbecue ideas, family gatherings, or even a quick weeknight meal.
There’s something about the smell of beef cooking that just screams comfort, doesn’t it?
Let’s get cooking those delicious broiled burgers! Grab your apron, and let’s make some magic happen!
The Art of Broiled Beef Burgers: Quick & Juicy Perfection
Let’s face it, there’s nothing quite like biting into a juicy beef patty dripping with flavor. and using the broiling method for meat ? well, that’s a game changer! today, i’m here to share my favorite approach to making broiled beef burgers - quick & juicy .
Grab your apron, and let’s get cooking!
Essential Preparation Steps
First things first, let’s talk about mise en place . it’s basically a fancy chef term meaning "everything in its place.
" before you start, lay out all your ingredients: ground beef, seasonings, and burger toppings. trust me, it makes things easier when you're deep in the burger-making zone!
Now, when it comes to time management , keep that timer handy. you’ll want to prep your beef mixture in 15 minutes , then chill the patties for 30 minutes .
This step is key for texture!
Organization strategies are also super important. i like to have my seasoning next to my beef. it keeps my flow going.
Plus, if you use a cutting board for your toppings, you’ll be ready to assemble everything quickly!
And let’s not forget safety considerations ! Always wash your hands after handling raw beef and keep a clean workspace.
Step-by-Step Process
Alright, here’s how we’re going to make these fabulous burgers.
-
Prepare burger mixture: in a bowl, mix 1 lb ground beef with 1 tsp kosher salt , 1/2 tsp black pepper , 1 tsp garlic powder , 1 tsp onion powder , and 1 tbsp worcestershire sauce .
Mix until just combined, don’t overdo it!
-
Shape Patties: Divide into 4 equal portions. Shape them into patties about 3/4 inch thick and make a little indentation in the center.
-
Chill Patties: Pop them in the fridge for 30 minutes . This helps the burgers keep their shape.
-
Preheat Broiler: Move your oven rack to 4-6 inches from the broiler and preheat.
-
Broil the burgers: line a broiler pan with foil (thank me later for this tip!). broil for 5 minutes on one side, then flip and broil for another 3- 5 minutes until the internal temp hits 160° f for medium doneness.
-
Melt Cheese (optional): Want that ooey-gooey goodness? Throw a slice of cheese on top right after flipping, then broil until just melted.
-
Assemble Burgers: Toast those buns if you’re feeling fancy, then load ‘em up with your burger patty, lettuce, tomato, pickles, and all the classic condiments.
Expert Techniques
Now let’s talk some pro tips! Cooking beef to perfection is all about patience. Don’t squish your burgers while they cook; you’ll lose all those delicious juices.
If you have a meat thermometer , use it! It makes checking that 160° F mark so easy.
Quality checkpoints include looking for nice grill marks and a golden-brown color on the burgers. If you see that, you’re golden – literally!
What if things go sideways? No worries. If they’re cooking too fast, lower the rack or move them to a cooler part of the oven.
Success Strategies
To avoid common mistakes, don’t skip the chilling step. that's where the magic happens, folks! and if your burgers are looking a bit dry, try adding a dash more worcestershire sauce next time.
That’ll keep those juicy beef patties nice and moist.
For perfect burger tips , always let them rest for a few minutes after cooking. This way, your juices redistribute, making every bite flavorful!
And hey, if you’re planning ahead, you can prep and chill your patties the day before. When your friends come over for a backyard barbecue, just pop them in the broiler for a quick beef dinner!
Now that you're all set, just remember, this easy burger recipe will bring the taste of restaurant-style burgers at home right to your kitchen.
Additional Information
Feeling inspired? keep experimenting with burger variations and toppings ! from avocado to jalapeños, the possibilities are endless. whether it’s a lazy sunday or a full-on barbecue party, these broiled burgers will make any gathering feel special.
Alright, my friend, I hope you're ready to make the juiciest burgers of your life! Happy cooking!
Pro Tips & Secrets to Burger Bliss
Hey friend! so, let’s dive into some secret nuggets of wisdom for making these broiled beef burgers - quick & juicy .
Seriously, these tips are like the confetti on your burger party!
Chef’s personal insights : first off, here’s a game-changer— chilling your burger patties for about 30 minutes before cooking helps them keep their shape and stay juicy.
Those little cold beef pats are like chillin’ in the fridge before the party. they’re ready to shine!
Time-saving techniques : in a rush? who isn’t, right? prep your patties a day in advance and just cook them off when you’re ready to eat.
Boom! you’ve turned a quick beef dinner into an even quicker one.
Flavor enhancement tips : want to kick up that flavor? try adding a splash of hot sauce to the meat mix or a dash of smoked paprika.
The more the merrier when it comes to flavor-enhancing ingredients!
Presentation advice : visual appeal matters too, folks! serve those juicy beef patties on homemade hamburger buns lightly toasted. stack ‘em high with fresh toppings, and don’t forget to pick a colorful plate for an instagram moment.
Perfect Presentation That Wow’s the Crowd
Okay, let’s talk about making your burgers look next-level .
Plating techniques : think height and color! place your burger patty tall on a plate, topped with vibrant tomatoes and greens.
A splash of ketchup can be a little artful drizzle on the side.
Garnish Ideas : Fresh herbs like cilantro or parsley not only taste great but also look fantastic. Maybe even a few jalapeño slices for a pop of color!
Color Combinations : Aim for variety! That classic American burger style comes alive with green, red, yellow—you get it!
Visual Appeal Tips : Don’t pile everything ‘til it topples over. A neat stack is crucial. You want to create a burger that folks are excited to eat, right?
Storage & Make-Ahead Magic
Let’s be real, not all of us finish all our burgers in one sitting (but no judgment if you do!). Here’s how to keep them for later.
Storage guidelines : wrapped tightly, your cooked burgers can last in the fridge for 3-4 days. but if you wanna stretch that time, consider freezing them.
They can hang out in the freezer for up to three months!
Preservation Methods : Use freezer-safe bags or containers. Just remember to label ‘em—nobody wants to thaw a mystery burger!
Reheating instructions : to reheat, pop ‘em in the oven or a skillet until they're heated through. microwave? this can be a little tricky; burgers can get rubbery, so avoid it if you can.
Freshness Duration : Even if you’re sticking them in the fridge, try to eat within 3-4 days for the best taste and quality.
Creative Variations That Keep It Fresh
If you’re the adventurous type, you’ll love giving your broiled burgers a twist!
Flavor Adaptations : Mix it up with different spices! Cajun seasoning for a kick, or maybe Italian herbs for a unique take.
Dietary Modifications : Got folks in your life with dietary restrictions? Ground turkey or a plant-based substitute can be game changers for healthy burger alternatives.
Seasonal Twists : As the seasons change, so can your burgers! Think of a pumpkin spice variation come fall or a fruity salsa topping in summer.
Regional Variations : Explore different vibes! Ever tried a Greek-style burger? Feta cheese, olives, and some tzatziki can transform your flavor palette.
Complete Nutrition Guide for Mindful Eating
Finally, let’s breakdown the nutrition. Knowing what’s in your burger makes for better choices.
Detailed Breakdown : Each juicy beef patty has about 450 calories—perfect for a heartier dinner.
Health Benefits : With protein around 25g per serving, these burgers will fuel your active lifestyle and can help build muscle.
Dietary Considerations : Keep in mind those who may want to go low-carb—opt for lettuce wraps instead of a bun.
Portion Guidance : Each burger is a filling serving, but if you're hosting a crowd, cut ’em in half for snackable bites!
And there you have it! all the deets you need to serve up the best broiled beef burgers - quick & juicy in town.
Now, go get to cooking and show off those restaurant-style burgers at home. you got this, champ! 🍔
Frequently Asked Questions
What are the best tips for making Broiled Beef Burgers - Quick & Juicy?
To achieve the best results with your Broiled Beef Burgers - Quick & Juicy, use cold ingredients and avoid overmixing the meat. Creating a small indentation in the center of the patties helps prevent puffing during cooking. Remember to monitor the internal temperature, aiming for 160°F for safe, juicy burgers.
Can I use different types of meat for this burger recipe?
Yes! While this recipe is specifically for beef burgers, you can easily substitute ground turkey or chicken for a lighter option. For those preferring a vegetarian alternative, consider using plant-based ground meat or black bean patties instead, though cooking times may vary.
How do I ensure my Broiled Beef Burgers stay juicy and flavorful?
To keep your burgers juicy, be gentle when mixing the ingredients and avoid pressing down on them while cooking. Chilling the patties for 30 minutes before broiling helps enhance the texture, and broiling at the right distance ensures they cook evenly without drying out.
How can I store leftover Broiled Beef Burgers?
Leftover Broiled Beef Burgers can be stored in an airtight container in the refrigerator for up to 3 days. For longer storage, consider freezing them. Wrap each burger tightly in plastic wrap and then place them in a freezer bag; they can be frozen for up to 3 months. Reheat in the oven or microwave before serving.
What are some delicious variations I can try with my burgers?
Explore different flavors by adding chopped herbs, BBQ sauce, or diced vegetables like onions or jalapeños to the beef mixture. You can also experiment with various cheeses on top, such as cheddar, blue cheese, or pepper jack for a spicy kick, to tailor the burgers to your tastes.
Broiled Beef Burgers: Quick & Juicy Perfection Card
⚖️ Ingredients:
- 1 lb (450 g) ground beef (80% lean)
- 1 teaspoon (5 g) kosher salt
- 1/2 teaspoon (2 g) black pepper
- 1 teaspoon (5 g) garlic powder
- 1 teaspoon (5 g) onion powder
- 1 tablespoon (15 mL) Worcestershire sauce
- 4 hamburger buns
- 4 slices of cheese (optional)
- Lettuce leaves
- Tomato slices
- Pickles
- Ketchup & mustard (to taste)
🥄 Instructions:
- Step 1: In a mixing bowl, combine ground beef, salt, pepper, garlic powder, onion powder, and Worcestershire sauce. Gently mix until just combined; avoid overmixing.
- Step 2: Divide the mixture into 4 equal portions. Shape each portion into a patty about 3/4 inch thick, making a slight indentation in the center for even cooking.
- Step 3: Place shaped patties on a plate and chill in the refrigerator for 30 minutes to enhance texture.
- Step 4: Position the oven rack 4-6 inches from the broiler and preheat.
- Step 5: Line the broiler pan with aluminum foil. Broil patties for 5 minutes on one side; flip and broil for an additional 3-5 minutes, or until the internal temperature reaches 160°F (71°C) for medium doneness.
- Step 6: If adding cheese, place a slice on each burger after flipping. Broil until just melted.
- Step 7: Toast buns (optional) and layer lettuce, the cooked patty, tomato slices, pickles, and condiments.
Previous Recipe: Easy & Flavorful Bake Portobello Pizza with Healthy Toppings: My Family’s Favorite
Next Recipe: Easy & Flavorful Quick Fish Stew with Shrimp & Veggies: My Go-To Recipe