Liquid Gold: How to Make Clarified Butter
Discover how to make clarified butter, a rich golden delight, perfect for sautéing and sauces. Elevate your cooking with this simple recipe!

- The Golden Elixir: Discovering Clarified Butter
- What's the Deal with Clarified Butter?
- Why You Need Clarified Butter in Your Life
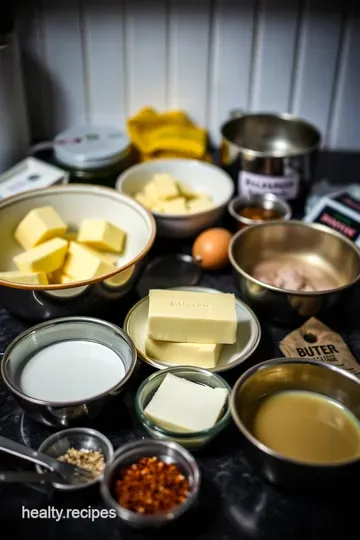
- The Essential Ingredients Guide: Your Kitchen Companion
- Liquid Gold: Mastering the Art of Clarified Butter
- Additional Recipe Information for Making Clarified Butter
- Frequently Asked Questions
- Recipe Card
The Golden Elixir: Discovering Clarified Butter
Oh my gosh, can we talk about clarified butter for a sec? i remember the first time i had it.
I was at a friend’s house for dinner, and they were whipping up a sauce that made my taste buds dance.
I thought, “what’s the secret?” they casually dropped, “it’s just clarified butter.” just like that, my culinary world turned upside down! who knew butter could be so fancy yet so simple?
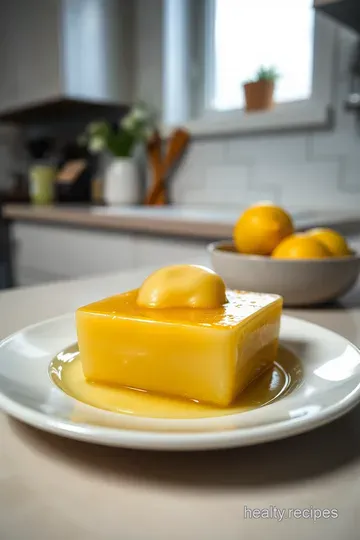
What is clarified butter? well, it's basically butter that’s been cooked down to separate the milk solids and water, leaving you with pure, golden fat.
Perfect for frying, roasting, or making that sauce that’ll wow your whole crew. honestly, it’s like liquid gold in a jar!
What's the Deal with Clarified Butter?
A quick look into into history
let’s take a little stroll down memory lane. clarified butter , or beurre clarifié as the french call it, has been around since ancient times.
It’s been a game-changing ingredient in kitchens worldwide, particularly in french and indian cuisines. and today, it’s making a comeback! everyone wants a slice of that glorious butter goodness.
Ever heard of ghee ? it’s the equally tasty cousin of clarified butter, with origins in indian cooking. so, in a way, we’re experiencing a “butter renaissance,” folks!
Easy peasy time commitment
now, for all you busy bees out there, let me ease your worries! making clarified butter is a breeze.
You can whip it up in just 20 minutes . yep, you heard that right! and it’s an easy recipe, even if you’re just starting out in the kitchen.
You’ll feel like a pro in no time!
Cost-conscious cooking
when it comes to cost, clarified butter won’t break the bank. a couple of sticks of unsalted butter (about 2 cups) will yield nearly a cup of that buttery magic.
So, you're getting a full cup of flavor for just a few bucks! perfect for all those 5 ingredient or less recipes we all love.
Why You Need Clarified Butter in Your Life
Healthy fats, hello!
let’s chat benefits. did you know that clarified butter is easier to digest than regular butter? yep! since it’s free of milk solids, it’s a great choice for those on a whole 30 diet or anyone with lactose intolerance.
Plus, it’s packed with healthy fats which means, yay! more energy for your day!
Serve it up right
what are some occasions to whip this up? honestly, any time you want to add a touch of lux to your meal.
Think dinner parties, holidays, or even a cozy night in with homemade ramen. drizzle it over roasted veggies or spread it on warm, crusty bread.
You’ll have family and friends singing praises!
Game-changer against regular butter
now, you might be wondering what makes clarified butter stand out. well, its high smoke point means you can cook at higher temperatures without the risk of burning it.
Perfect for sautéing or making that golden brown butter for your baked goods! trust me; once you try it, regular butter just won’t cut it anymore.
So, if you’re ready to dive into the beautiful world of clarified butter, let’s get to the good stuff! grab those few ingredients, and let’s make some magic happen with our very own clarified butter recipe .
It’s time to elevate those meals to liquid gold status!
The Essential Ingredients Guide: Your Kitchen Companion
For anyone who loves to cook, knowing your ingredients is like having a secret weapon in your culinary toolkit. let’s dive into the premium core components every home chef should be familiar with.
Pinning Down the Basics
First off, let’s talk measurements. whether you're a fan of the good ol' us system or you've gone all-in with metric , you'll need to know how to scale your recipes.
The best way to get your hands on the proper measurements is to keep a trusty scale handy. if a recipe calls for 2 cups of flour or 500 grams , having both can make life so much easier.
When it comes to quality indicators , always observe your ingredients. fresh herbs should look vibrant, not wilted, and spices should be aromatic.
Here's a quick tip: check the expiration dates on spices! they can lose flavor over time, like that pair of shoes you bought for a single high school dance—cute but rarely used.
Storing your ingredients properly is crucial. most spices last about 1-3 years, but fresh produce? that’s a whole different game.
Store your veggies in the fridge and keep your dry goods in a cool, dark place.
Spice It Up with Signature Seasonings
Now, let’s pivot to the fun part— signature seasoning blends ! a bit of creativity in your spice rack can turn a blah dish into a "wow, what is this?!" experience.
Think of a classic blend: smoked paprika, cumin, and garlic powder for a smoky kick.
Don't forget about herbs! basil goes with tomatoes like peanut butter goes with jelly—pure harmony. that said, if you're missing a specific herb, feel free to explore regional variations .
Thyme can swap in for rosemary, and you're on your way to a delightful dish!
Smart Substitutions Make You a Kitchen Magician
Sometimes you find yourself in a pinch: no butter for your cookies? no problem. let’s explore smart substitutions . you could easily make clarified butter at home, a fantastic option! and if you're on a plant-based kick, coconut oil is a game-changer.
For those following a special diet, whether it's whole 30 or vegan, check out dietary modifications . silken tofu can stand in for cream in some recipes.
Got a last-minute friend who can’t have gluten? use oatmeal instead of bread crumbs.
Gear Up with Kitchen Equipment Essentials
Before we wrap this up, let’s not overlook equipment. you really don’t need a fancy kitchen to create magic—just a few must-have tools .
A solid knife, a sturdy cutting board, and a couple of mixing bowls can transform you into a kitchen ninja.
Alternative options like a hand whisk can totally replace an electric mixer—plus, it doubles as a workout! always practice good storage solutions too.
Invest in good containers; they keep your food fresh and your fridge organized.
Bringing It All Together
As you gear up for your next culinary adventure, just remember: cooking is about creativity , fun , and of course, a sprinkle of love .
From figuring out how to make ghee from butter to adding a touch of gourmet flair to your regular ramen, the possibilities are endless!
So if you're ready to whip up something extra special, let’s move on to the instructions for that delicious clarified butter you’re itching to try.
It's time to elevate your dishes, one golden drop at a time!
Liquid Gold: Mastering the Art of Clarified Butter
Oh my gosh, if you’ve never tried clarified butter , you are in for a real treat! this golden elixir, known as "beurre clarifié" in french kitchens, is an absolute game changer.
It’s all about those silky sauces and heavenly sautés. plus, it has a high smoke point, making it perfect for frying or roasting.
Seriously, once you learn how to make clarified butter , you’ll wonder how you ever lived without it.
Essential Preparation Steps
Before you dive into the actual cooking, let’s talk about some essential prep steps! This is where you channel your inner chef and set the stage for success.
Mise en place is key! start by chopping your 2 cups of unsalted butter into chunks. this helps it melt evenly.
No one likes burnt butter! speaking of which, keep your temperature between 225° f and 250° f. trust me on this.
Time management? super easy! while the butter melts (about 15 minutes ), you can prepare your jars and get your strainer ready.
You can even infuse your clarified butter with herbs if you’re feeling fancy!
And hey, safety first ! Always keep an eye on the melting butter. We don’t want any smoky mishaps, right?
Step-by-Step Process to Perfect Clarified Butter
Let’s break down the process! Here’s how to get it just right:
- Prepare - Slice your butter into small pieces.
- Melt - Place the butter in a heavy-bottomed saucepan over low heat. Keep it at about 250° F . No stirring; just let it do its thing!
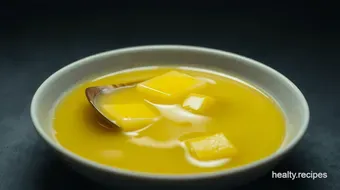
- Separate - After around 10 minutes , watch for foam. Don’t stress it; this is just the milk solids separating.
- Clarify - Once melted, and if the milk solids have settled (you’ll see them at the bottom), take it off the heat.
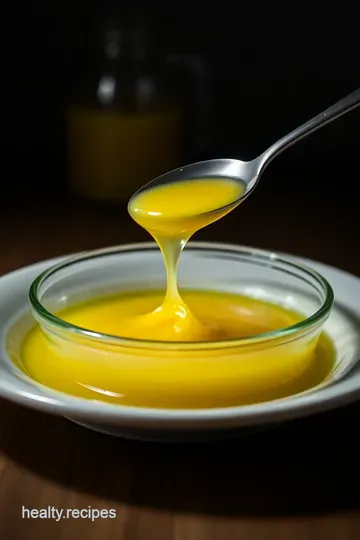
- Strain - Carefully pour the butter through a fine mesh strainer into a heatproof jar. The milk solids should stay behind, creating that glorious liquid gold.
- Store - Let it cool to room temperature before sealing it up. It’ll keep up to a month in the fridge or can be frozen if you want to hoard this gold!
Expert Techniques to Elevate Your Butter Game
Okay, let’s talk shop! Here are some expert techniques to consider for getting the most out of your butter:
- You want to maintain that low heat. Too hot, and you risk burning it. I mean, who wants to deal with burnt offerings?
- Keep an eye on the foam! As it reduces, you’re nearing that perfect clarified state.
- For added flavor, try infusing with herbs during melting. Rosemary and thyme? Heck yes!
Success Strategies: Avoiding the Pitfalls
We’ve all been there—the common mistakes that can ruin your hard work. Let’s avoid those:
- Rushing the melt. Trust me, patience is a virtue here.
- Using salted butter? Nah. Stick to unsalted for the best flavor.
- Letting the milk solids brown too much. You want golden color, not dark brown!
To ensure quality, once you’ve clarified, taste it! If it’s nutty and rich, you’re golden.
Wrapping it Up: Your Go-To Clarified Butter Recipe
So, there you have it! with this clarified butter recipe , you’ll be whipping up culinary delights like nobody’s business! drizzle it over seafood, mix it into mashed potatoes, or even use it in your favorite kerrygold butter recipes .
And hey, if you want to explore more fun stuff, i’ve got additional cooking substitutes and tips for 5 ingredient or less recipes in the next section.
But seriously, try this clarified butter first. it's the perfect addition to elevate any dish! happy cooking, friends!
Additional Recipe Information for Making Clarified Butter
Oh man, if you’ve ever had a dish that just tasted next level , chances are it was drizzled in some delicious clarified butter .
It’s like the secret sauce in gourmet cooking, and once you learn how to make your own, you’ll wanna use it for everything! so, let’s dive into some pro tips, presentation tricks, storage hacks, creative variations, and a quick look at the nutrition—because who doesn’t love a bit of "liquid gold" on their plate?
Pro Tips & Secrets
First off, how to clarify butter is super easy! my biggest tip? patience . seriously, don't rush it. melt that unsalted butter slowly over low heat.
You want those milk solids to float to the surface and disappear . plus, here’s a fun time-saving trick: while you’re waiting, chop some herbs for infusing the butter later.
Honestly, a dash of rosemary or thyme will take your clarified butter from basic to fancy pants in no time.
Want to enhance the flavor even more? try adding some garlic cloves or a pinch of smoked paprika. your taste buds will thank you.
Oh, and when straining, a fine mesh strainer or cheesecloth is your best friend. just imagine all those little crispy bits of burnt butter being left behind while you're left with pure liquid bliss.
Perfect Presentation
Now let's talk about presenting that gorgeous clarified butter. you can’t just pour it into any old jar! use a clear glass container so folks can appreciate that golden color.
Here’s a sweet idea: drizzle some over a fresh veggie platter, and watch everyone’s eyes light up. when it comes to garnishing? a sprinkle of fresh herbs on top adds that fancy touch and a pop of color.
Talk about instagram-ready !
And if you’re serving it for a special meal, pair it with some freshly baked artisan bread. I mean, who can resist dipping warm bread into butter? It’s like a one-way ticket to flavor town, am I right?
Storage & Make-Ahead
So, once you’ve made your dreamy clarified butter, how do you keep it nice and fresh? here’s the scoop: let it cool, then pour it into a heatproof jar and seal it up.
It’ll stay good in the fridge for about a month. if you’re like me and make a big batch, you can even freeze it! just break out those ice cube trays.
Pour in the liquid and freeze individual portions. who knew freezing clarified butter was such a game changer?
When reheating, don’t pop it in the microwave all willy-nilly. gently warm it on the stove over low heat to bring it back to life.
It only takes a couple of minutes, and you’re golden!
Creative Variations
Now, if you’re feeling a little adventurous, don’t be shy! there are soooo many ways to get creative with butter recipes homemade .
Feeling spicy? add some chili flakes when making your clarified butter. or, if you’re vegan or just looking to swap things up, try making ghee from coconut oil —it’s a fab dairy-free alternative!
And hey, depending on the season, you can mix in fall spices like cinnamon or nutmeg to give your clarified butter a warm, cozy vibe.
Trust me; it's a seasonal twist that goes perfectly with roasted veggies.
Complete Nutrition Guide
Now, before you dive in headfirst into that clarified butter pool, let’s talk health. yes, it’s a fat, but it’s a good fat! a tablespoon packs about 100 calories but provides vitamins like a, d, and e.
If you’re following a whole 30 diet plan , clarified butter is a great oil option for cooking.
Just remember to use it in moderation. a little drizzle goes a long way in flavoring your dishes. portion sizes matter, so maybe skip the 1-up burger with clarified butter on top and stick to a sprinkle on your steamed veggies instead.
Conclusion
So, there you have it! making your own clarified butter is not just a cooking technique; it’s a culinary adventure waiting to unfold.
There’s something so satisfying about pouring a jar of liquid gold over your favorite meals. you’ve got pro tips, presentation ideas, storage strategies, creative variations, and even a nutrition rundown—all laid out for you.
Now that you know how to clarify butter and elevate your cooking game, go for it! experiment, have fun in the kitchen, and never be afraid to make a mess.
Cooking is all about joy, and you deserve every bit of it. happy cooking, friend!
Frequently Asked Questions
What is clarified butter, and how is it different from regular butter?
Clarified butter is pure butterfat, made by melting regular butter and allowing the water and milk solids to separate. This process results in a nutty-flavored, golden liquid that has a higher smoke point than regular butter, making it perfect for frying and sautéing without burning – ideal for your next stir-fry or Sunday roast!
How do you make clarified butter at home?
Making clarified butter at home is quite simple! Start by melting unsalted butter in a heavy-bottomed saucepan over low heat, then let it simmer until the milk solids settle at the bottom and a foam forms on the surface. Once melted and clear, strain it into a jar, and voila – you've got your very own clarified butter!
Can you store clarified butter, and what's the best way to keep it fresh?
You absolutely can store clarified butter! Once it’s cooled, transfer it to an airtight jar and refrigerate for up to a month. For longer storage, you can freeze it in ice cube trays and transfer the cubes to a bag or container for handy portions – perfect for when you want to whip up a quick sauce or sauté!
Are there any health benefits to using clarified butter?
Clarified butter is lactone-free, making it suitable for those who are lactose intolerant. It also contains healthy fats that can promote nutrient absorption and is rich in fat-soluble vitamins. Just like that classic-crusty Yorkshire pudding, clarified butter can add some indulgent flair to your meals in moderation!
How can I infuse my clarified butter with flavors?
Infusing clarified butter is a doddle! Simply add herbs like rosemary or garlic to the melted butter while it's cooking, allowing them to steep before straining. It's like crafting your very own bespoke butter – perfect for spooning over steak or drizzling on freshly baked bread for a real treat!
Is ghee the same as clarified butter?
While ghee is a form of clarified butter, it takes things a step further by cooking the butter until the milk solids become brown and develop a more intense, nutty flavor. Think of it as clarified butter with a bit of extra personality! Both are fantastic cooking fats, but ghee has its own fame in Indian cuisine worth exploring.

Liquid Gold: How to Make Clarified Butter Card
⚖️ Ingredients:
- 2 cups unsalted butter (454 grams)
🥄 Instructions:
- Step 1: Cut the unsalted butter into pieces for even melting.
- Step 2: Place the butter in a heavy-bottomed saucepan over low heat. Allow it to melt gently without stirring.
- Step 3: As the butter melts, a foam will form on the surface. Maintain low heat to prevent burning.
- Step 4: After about 10 minutes, the milk solids will settle at the bottom. Once the butter is completely melted and the milk solids have separated, remove from heat.
- Step 5: Carefully pour the liquid butter through a fine mesh strainer or cheesecloth into a heatproof jar, leaving the solids behind.
- Step 6: Allow to cool to room temperature before sealing the jar. Clarified butter can be refrigerated for up to a month or frozen for longer storage.
Previous Recipe: Easy & Delicious Healthy Lunch Ideas: Zesty Quinoa & Chickpea Salad
Next Recipe: Classic White Bread: My Easy & Foolproof Homemade Recipe