Homemade Chocolate Bars
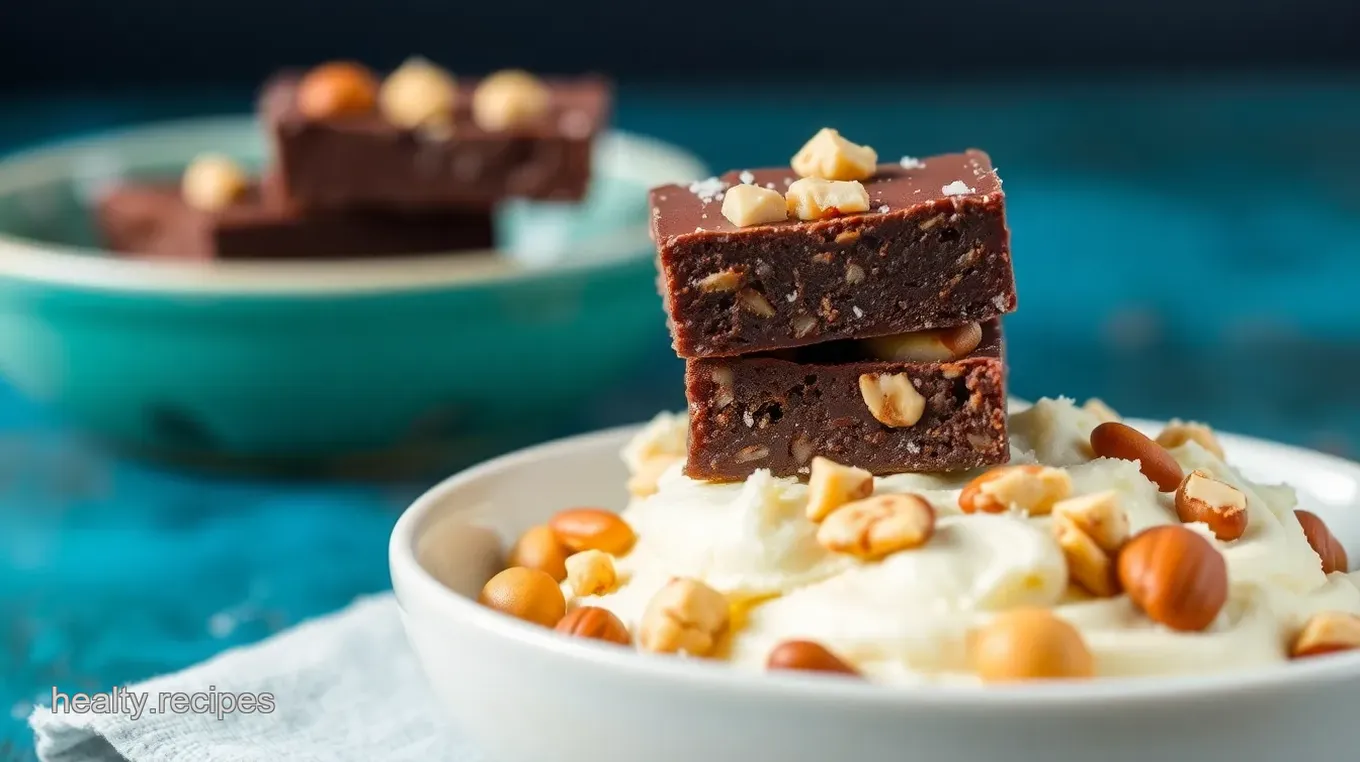
Try these Homemade Chocolate Bars! In just 1 hour, make delicious dark chocolate treats with nuts and spices. Perfect for dessert or gifts!

- About Homemade Chocolate Bars
- The Complete Guide to Authentic Homemade Chocolate Bars
- The Magic Behind This Recipe
- Health & Nutrition Highlights
- Recipe at a Glance
- Master Ingredient List
- Kitchen Equipment Essentials
- Perfect Cooking Technique
- Expert Kitchen Wisdom
- Perfect Presentation
- Storage & Make-Ahead
- Creative Variations
- Expert FAQ Solutions
- Complete Nutrition Guide
- Recipe Card
About Homemade Chocolate Bars
Homemade chocolate bars have a rich historical background that dates back to ancient civilizations. The origin of chocolate can be traced to the Mayans and Aztecs, who cherished cacao beans for their unique flavor and invigorating properties. Over centuries, chocolate transitioned from a bitter beverage to the sweet treat we adore today. This evolution has made homemade chocolate bars a delightful culinary tradition enjoyed worldwide.
What makes homemade chocolate bars truly special? First, they offer unparalleled customization. You can choose high-quality ingredients tailored to your taste preferences. Secondly, making these treats at home ensures freshness and flavor that store-bought options often lack. Lastly, crafting your own chocolate bars is not only fun but also an excellent way to impress family and friends with delicious gifts crafted with love.
The Complete Guide to Authentic Homemade Chocolate Bars
The art of creating authentic homemade chocolate bars reflects a rich culinary heritage that spans generations. This recipe connects you to the fascinating journey of cacao transformation into delectable confections. While different cultures have their variations, this guide provides insights into crafting your version while honoring traditional techniques.
Culturally significant in many societies, chocolates symbolize love and celebration—a custom evident during special occasions like Valentine's Day or holidays such as Easter. Today’s popularity of DIY treats showcases people’s desire for creativity in cooking while indulging in tasty delights.
The Magic Behind This Recipe
What makes our homemade chocolate bar recipe so magical? It begins with unique flavor combinations that cater to every palate—think dark cocoa paired with nuts or dried fruits! These elements create exciting contrasts that elevate each bite into an experience worth savoring.
Additionally, our foolproof techniques ensure even novice cooks achieve perfect results every time they attempt this recipe! With expert-tested methods passed down through generations, you’ll feel confident navigating each step without fear of failure.
Time-saving tips are integrated throughout the process; from melting techniques using either double boilers or microwaves designed for efficiency—to straightforward mixing instructions making it accessible even on busy days!
Health & Nutrition Highlights
Homemade chocolate bars provide several key nutritional benefits when prepared thoughtfully. Using high-quality dark chocolate offers antioxidants known for promoting heart health while minimizing added sugars compared to commercial varieties fosters better overall wellness.
Dietary considerations are essential as well: by controlling ingredient choices—including optional add-ins like nuts or dried fruits—you can accommodate various dietary needs such as gluten-free or vegan diets without compromising taste!
Wellness advantages abound when enjoying modest portions; moderation allows you enjoyment along with balanced nutrition facts ensuring these indulgences fit seamlessly within healthier lifestyles!
Recipe at a Glance
This enticing homemade chocolate bar recipe requires approximately 30 minutes total preparation time before cooling—making it simple enough for anyone eager to dive into dessert-making quickly!
Skill level required is beginner-friendly yet rewarding enough for experienced bakers looking for something new! Each batch yields around 8-10 servings depending on mold size chosen while remaining cost-efficient due its minimal ingredient list—which means you won’t break the bank creating mouthwatering sweets right at home!
By following this comprehensive guide filled with history and modern-day relevance alike—you'll master how easy it is transform simple ingredients into luxurious decadent treats everyone will enjoy! So gather those molds—and let’s make some heavenly homemade chocolates together!

Master Ingredient List
Premium Core Ingredients
-
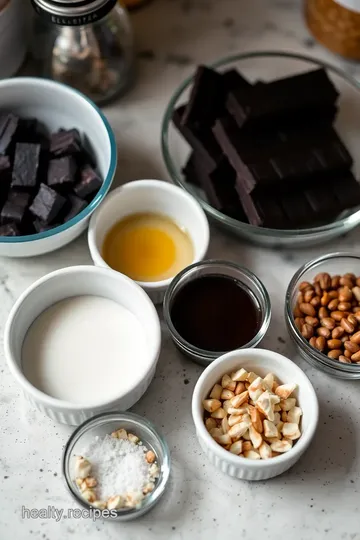
Dark Chocolate (8 oz / 225g) : Opt for high-quality dark chocolate with at least 70% cocoa content. Look for brands that use minimal additives and have a rich, smooth texture when melted. Check the ingredient list; it should contain cocoa mass, cocoa butter, sugar, and possibly vanilla.
-
Sweetened Condensed Milk (1/2 cup / 120ml) : This ingredient adds creaminess to your chocolate bars. Choose a brand that is thick and sweet without any artificial flavors or preservatives. Store opened condensed milk in an airtight container in the refrigerator for up to one week.
-
Vanilla Extract (1 tsp) : Use pure vanilla extract instead of imitation vanilla for a more authentic flavor. Store it in a cool, dark place to maintain its potency.
-
Salt (Pinch) : A pinch of salt enhances the sweetness of chocolate. Opt for sea salt or kosher salt as they provide better flavor compared to table salt.
Signature Seasoning Blend
-
Chopped Nuts : Almonds, hazelnuts, or walnuts are great choices for texture and flavor. Select unsalted nuts to avoid overpowering the chocolate's taste. Store nuts in an airtight container in the fridge to keep them fresh longer.
-
Dried Fruits : Cranberries, raisins, or apricots add natural sweetness and chewiness. Choose unsweetened varieties when possible to control sugar levels in your bars.
-
Spices : Consider adding cinnamon or chili powder for unique twists on traditional chocolate flavors. Freshly ground spices provide optimal aroma and taste—store them away from light and heat sources.
Smart Substitutions
-
Chocolate Alternatives : If you prefer different types of chocolates like milk or white chocolate, feel free to swap them out based on personal preference while keeping similar measurements.
-
Dietary Swaps : For vegan options, use dairy-free dark chocolate along with almond or coconut milk instead of sweetened condensed milk.
-
Emergency Replacements : In case you run out of certain ingredients like vanilla extract, substitute it with maple syrup for a different but pleasing flavor profile.
-
Seasonal Variations : During holidays such as Halloween or Christmas, consider adding seasonal spices like nutmeg or gingerbread seasoning into your mix!
Kitchen Equipment Essentials
-
Chocolate Bar Molds : Silicone molds allow easy removal after setting; choose shapes that suit your aesthetic desires! They can be found easily online or at local kitchen supply stores.
-
Double Boiler Setup : A heatproof bowl over simmering water melts chocolate evenly without burning it; if unavailable, use a microwave-safe bowl instead!
-
Heat-resistant Spatula : This tool helps scrape down every last bit of melted goodness from your mixing bowl while preventing burns during handling hot mixtures.
Pro Ingredient Tips
Selection Secrets
When choosing your core ingredients:
- Always read labels carefully.
- Prioritize organic products where possible.
- Don’t hesitate to ask staff at specialty stores about their best recommendations!
Quality Markers
Look out for signs indicating quality such as:
- Cocoa percentage listed prominently on packaging.
- Nut freshness can often be detected by smell—fresh nuts shouldn’t smell rancid!
- Ensure extracts don’t have added sugars unless required by recipe guidelines!
Storage Solutions
Keep all perishables stored correctly:
- Dark chocolate should remain wrapped tightly at room temperature away from sunlight. 2 .Store open bags of nuts inside freezer-proof containers if not consumed within two weeks. 3 .Condensed milk must always go into sealed jars once opened—never leave exposed!
Money-saving Tips
Save money by: 1 .Buying ingredients in bulk whenever feasible—this applies especially well with dried fruits & nuts! 2 .Searching local farmers' markets during peak seasons could yield fresher results than grocery store finds! 3 .Using homemade substitutes rather than pre-packaged items whenever possible will cut costs significantly too!
By considering these premium core ingredients alongside smart substitutions and essential equipment tips outlined above—you'll set yourself up beautifully toward creating delectable homemade chocolates right from scratch! Enjoy crafting something special today!
Perfect Cooking Technique
Essential Preparation Steps
Before starting any cooking process, it’s crucial to prepare. First, gather all your ingredients and equipment. This practice is called mise en place which means "everything in its place." Chop vegetables, measure spices, and have pots ready. This saves time when you start cooking.
Next, use proper prep techniques like washing produce thoroughly and cutting them uniformly for even cooking. Aim for consistent sizes; this helps achieve the best results.
Time management plays a significant role in successful cooking. Estimate how long each step will take and create a timeline to stay on track. For instance, if grilling chicken takes 20 minutes, start with side dishes that require less time so they finish together.
Finally, stay organized by keeping your workspace tidy. Clean as you go to avoid clutter while ensuring everything is accessible during the cooking process.
Professional Cooking Method
Now let's dive into the professional method of cooking your dish step-by-step. Start by preheating your oven or stovetop to the required temperature—this often ranges from 350°F (175°C) for baking to medium-high heat for sautéing around 375°F (190°C). Proper temperature control is vital as it directly affects flavor and texture.
Once you've preheated appropriately, begin by following your recipe carefully. Pay close attention to timing precision; set timers where necessary—this can prevent overcooking or burning foods.
As you cook, monitor success indicators such as color changes in meats or bubbling sauces that indicate readiness. For example, perfectly grilled steak should reach an internal temperature of at least 145°F (63°C) for medium-rare.
Expert Techniques
To elevate your skills further with expert techniques: first focus on using professional methods like sous vide or blanching when appropriate. Sous vide involves vacuum-sealing food and immersing it in a water bath at precise temperatures for extended periods resulting in tender textures.
Critical steps include searing proteins before slow-cooking them—this enhances flavors through caramelization known as the Maillard reaction which occurs ideally between 300°F (150°C) and 500°F (260°C).
Precision points matter greatly too; use instant-read thermometers to check doneness accurately without cutting into meat prematurely—a mistake many home cooks make!
Lastly, implement quality checks throughout the process by tasting periodically! Adjust seasonings based on personal preference but ensure not to overpower original flavors.
Success Strategies
Even experienced cooks encounter challenges; therefore troubleshooting tips are essential for perfect results every time! If sauce appears too thin after simmering longer than expected add cornstarch slurry slowly until desired thickness achieves without lumps forming.
Quality assurance comes from assessing visual cues: vibrant colors indicate freshness while dullness may suggest overcooked items needing adjustments next attempt!
For guaranteed perfect outcomes follow these strategies closely: Always read recipes fully beforehand ensuring understanding before beginning each step sequence will streamline efforts effectively reducing confusion later!
Finish up with final touches such as garnishing dishes wisely—fresh herbs offer aesthetic appeal along with added flavor enhancing overall dining experience significantly!
By adhering these guidelines diligently you'll refine both technique efficiency ingenuity crafting delightful meals consistently enjoyed by all who partake!

Expert Kitchen Wisdom
Creating homemade chocolate bars can be a fulfilling experience. To ensure your success, it's essential to understand some professional insights. Always choose high-quality chocolate with at least 70% cocoa for the best flavor and texture. Melting techniques matter, so use a double boiler or microwave wisely to avoid burning the chocolate.
Expert techniques like tempering chocolate can elevate your bars' shine and snap. This method stabilizes the cocoa butter crystals, resulting in perfectly glossy chocolates. Remember to work quickly once melted; warm chocolate sets faster than you think!
Kitchen wisdom suggests keeping your workspace organized. A tidy area helps maintain focus and reduces mistakes during preparation. Finally, follow each step closely for guaranteed results that will impress family and friends.
Perfect Presentation
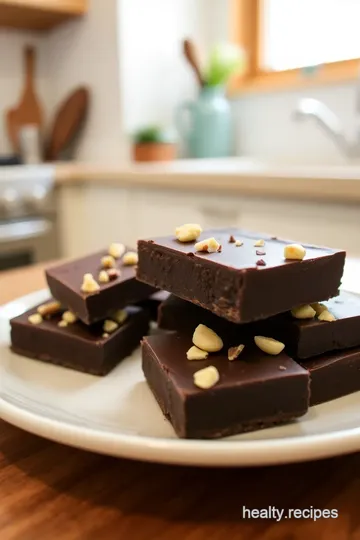
Presentation is key when serving homemade chocolates! Use plating techniques such as arranging bars on a decorative platter or using parchment paper for an elegant touch.
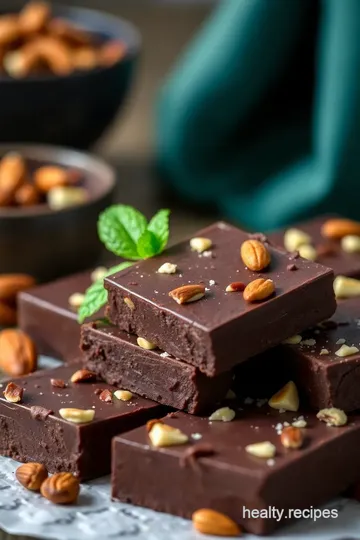
For garnish ideas, consider drizzling melted white chocolate over dark bars or sprinkling sea salt flakes for added flair. Serving suggestions include pairing your chocolates with fresh fruit or artisan cheese to create delightful contrast.
To enhance visual appeal, use vibrant colored sprinkles or edible flowers as toppings. A well-presented plate not only looks good but also elevates the overall tasting experience!
Storage & Make-Ahead
Proper storage ensures your homemade chocolate stays fresh longer. Store them in an airtight container at room temperature away from sunlight for up to two weeks.
If you live in a warm climate, refrigerate them but allow them to reach room temperature before serving for optimal taste and texture. Preservation methods like wrapping individual pieces in foil help maintain freshness while preventing sticking.
Reheating instructions are simple: if you need to melt any leftover bars again, do it gently using low heat on a double boiler or short bursts in the microwave. Freshness tips include checking for any signs of bloom (white powdery film), indicating changes in quality due to temperature fluctuations.
Creative Variations
Get creative with flavor adaptations by experimenting with different types of chocolate! Try milk or white chocolate variations alongside dark options for diverse flavors.
Dietary modifications are easy too—use dairy-free alternatives like coconut milk instead of sweetened condensed milk if needed. Seasonal twists such as pumpkin spice during fall add excitement while regional variations could involve unique local ingredients like matcha powder or chili spices from different cultures!
These creative approaches let you customize recipes based on personal preferences and occasions!
Expert FAQ Solutions
Many home chefs have common concerns about making their own chocolates. An expert answer addresses issues related to melting temperatures; always aim between 110°F-120°F (43°C-49°C) when melting dark chocolate.
A troubleshooting guide suggests remedies if your mixture appears grainy—ensure no water touches the bowl while melting! If you're struggling with setting times, check that you've cooled them long enough before moving them into molds properly cured through refrigeration.
Success tips include patience throughout this process; great things take time—and delicious homemade chocolates are no exception!
Complete Nutrition Guide
Understanding nutrition is vital when enjoying treats like homemade chocolates! Each bar contains roughly 150 calories per ounce depending on ingredients used—notably those rich in protein from nuts may increase this count slightly further along with sugars tied back into sweeteners too!
Health benefits abound; dark chocolate provides antioxidants which may promote heart health while adding dried fruits boosts fiber intake significantly—making these indulgences somewhat guilt-free after all!
Dietary information varies based on chosen ingredients—for example gluten-free options exist simply by avoiding any processed additives commonly found elsewhere within confectioneries today! Portion guidance encourages moderation: enjoy one square daily rather than overindulging all at once!

Homemade Chocolate Bars Card

⚖️ Ingredients:
- 8 oz (225g) high-quality dark chocolate (70% cocoa or higher)
- 1/2 cup (120ml) sweetened condensed milk (optional for creamier texture)
- 1 tsp vanilla extract
- Pinch of salt
- Chopped nuts (almonds, hazelnuts, or walnuts) - optional add-in
- Dried fruits (cranberries, raisins, or apricots) - optional add-in
- Sea salt flakes for topping - optional add-in
- Spices (cinnamon or chili powder) - optional add-in
🥄 Instructions:
- Step 1: Prepare the Double Boiler: Fill a pot with water and bring it to a simmer. Place a heatproof bowl on top of the pot ensuring it doesnt touch the water.
- Step 2: Add Chocolate: Break the dark chocolate into small pieces and add them to the bowl.
- Step 3: Melt: Stir occasionally until fully melted and smooth. If using a microwave, place chocolate in a microwave-safe bowl and heat in 30-second intervals at medium power, stirring in between until melted.
- Step 4: Once melted, remove from heat and let cool slightly.
- Step 5: If desired, stir in sweetened condensed milk for creaminess along with vanilla extract and pinch of salt until combined well.
- Step 6: Carefully pour the melted chocolate mixture into your prepared molds.
- Step 7: If adding any optional ingredients like nuts or dried fruit, sprinkle them evenly over the top before pouring more chocolate if desired.
- Step 8: Tap the mold gently on your countertop to release air bubbles.
- Step 9: Place molds in refrigerator for about 30 minutes to an hour until completely set.
- Step 10: Once set, carefully remove chocolates from their molds by gently pushing from underneath.
Previous Recipe: Bake Protein-Packed Cheesecake Bites
Next Recipe: Grilled Chicken Breast with Garlic Herbs
