Nutty Energy Balls: The Ultimate Healthy Snack
Looking for a delicious energy boost? My Nutty Energy Balls are an easy, no-bake treat that includes wholesome ingredients. Perfect for busy days!

- Feeling Tired? Try Making These Nutty Energy Balls!
- The History of Nutty Energy Balls
- Why You’ll Love Nutty Energy Balls
- Getting Started: Ingredients for Nutty Energy Balls
- Essential Ingredients Guide
- Cooking Like a Pro: Your Guide to Professional Techniques
- A Nutty Adventure: Making Energy Balls at Home
- Frequently Asked Questions
- Recipe Card
Feeling Tired? Try Making These Nutty Energy Balls!
Oh my gosh, have you ever had those days where you feel like you could nap at your desk? like, you’re staring at your computer screen, and your eyelids feel heavier than a bowling ball? trust me, i’ve been there way too many times! that’s when i discovered energy balls .
These lovelies are my secret weapon for that midday slump.
Energy balls popped into my life when i was looking for an alternative to sugary snacks. i mean, i love cookies as much as the next person, but sometimes you need a little pick-me-up that won’t have you crashing harder than a kid on a sugar rush.
So, i tried making nutty energy balls , and let me tell you, they saved the day! not only do they taste fantastic, but they pack a punch of nutrition too.
The History of Nutty Energy Balls
Originally, energy balls are born from the no-bake snack trend, which took off in the health community, especially among busy folks needing quick, convenient snacks.
They blend ingredients that are wholesome yet satisfyingly tasty! their modern popularity is all thanks to folks looking for healthy, easy-to-make grab-and-go snacks.
Speaking of easy, you can whip these babies up in just 15 minutes ! yeah, you heard me right. plus, they require no cooking.
After mixing, they chill in the fridge for about 30 minutes —that’s right, you can throw them together while you binge-watch your favorite show!
Why You’ll Love Nutty Energy Balls
Let’s get to the good stuff! these little nuggets of joy are not just quick snacks; they bring a ton of benefits.
First off, they’re filled with wholesome ingredients like rolled oats and mixed nuts. that means you’re not just munching mindlessly—you’re actually feeding your body goodness! each ball is about 140 calories of pure energy, with a decent amount of protein to help keep you full.
Whether you're heading to work, going for a hike, or even having a lazy afternoon at home, these nutty energy balls fit the bill.
You can make them for special occasions too, like a fun snack for game day or a healthy treat for the kids' school lunches.
And let’s be real, who wouldn’t want something like these instead of chips or candy?
Compared to other snacks, these energy balls have some serious unique selling points. for one, they’re super customizable! like, you can switch out the nut butter for sunflower seed butter if you have nut allergies.
You can even sneak in chocolate chips or dried fruit—whatever your heart desires.
Getting Started: Ingredients for Nutty Energy Balls
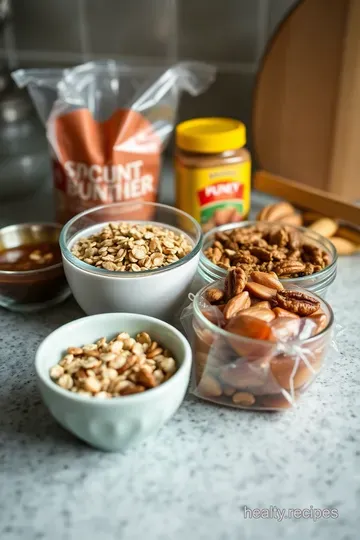
Before we jump into how to make these awesome energy balls , let me lay down what you'll need:
Ingredients:
- 1 cup rolled oats
- 1/2 cup nut butter (almond or peanut works great!)
- 1/4 cup honey or maple syrup
- 1/2 cup mixed nuts, chopped
- Optional: 1/4 cup dark chocolate chips, 1/4 cup shredded coconut
- 1 tsp vanilla extract
- 1/2 tsp salt
Gather these goodies, and let’s get rolling! Honestly, if you’ve got a mixing bowl and a spoon, you’re halfway there.
Now, isn’t that easy peasy?
So, whether you’re feeling snacky in the afternoon or need something healthy to power you through your day, these nutty energy balls are your go-to treat.
They’re not just another snack; they’re your little pocket of joy. get ready to enjoy some tasty, nutritious bites! now let’s dive into how to make them.
Essential Ingredients Guide
Cooking is about creating magic with the right ingredients. if you’ve ever thought about whipping up a quick snack or a meal, knowing your premium core components is key.
Let’s dive into these essentials that can elevate your kitchen game!
Premium Core Components
When it comes to ingredients, measurements are like the secret sauce. get this right, and you'll be on the path to deliciousness.
For instance, roll your oats with a cup (90g) —that’s a whole lot of fiber goodness! for those in the metric world, that’s around 125g .
Now, how do you know if your ingredients are top quality? look for indicators like vibrant colors and fresh aromas.
Those red beets should be firm and colorful, not wilting away. as for storage? keep your pantry cool and dry.
Most dry goods will last a while, but use that imagination!
Signature Seasoning Blend
Let's spice things up! you don’t need a master chef background for the perfect seasoning blend. mix it up with essential spices like cumin and paprika.
Want a herb explosion? pair fresh basil with zesty lemon for a salad with burrata that will knock your socks off.
And hey, consider the region! a little cayenne pepper brings southern warmth, while dill can give you a taste of the coast.
Flavor enhancers like garlic or onions? yes, please! they just scream flavor and should always have a spot in your pantry.
Smart Substitutions
Ever been in a bind where you’re missing an ingredient? it happens to the best of us. this is where common alternatives come in.
If you don’t have nut butter for those energy balls, feel free to use sunflower seed butter —it’s a game changer for those with allergies!
Dietary modifications are also super trendy. going vegan? swap honey for agave syrup. seasonal options also matter; in winter, think hearty roasted beets and carrots to warm your soul, whereas summer calls for fresh carrots salad with zesty vinaigrette.
Kitchen Equipment Essentials
Now, let's chat about tools. you don’t need an extravagant setup to whip up your favorite dish. all you need is a mixing bowl, a spoon, and measuring cups.
Oh, and a baking sheet or plate to chill those nutty energy balls!
If you’re fancy, a food processor can make life easier, but honestly? a good ol’ spatula does just fine. need to declutter? store your essentials in clear containers.
They not only look cute but also make grabbing what you need a breeze.
Wrapping It Up
Okay, my fellow food ensoiasts, you’ve got the essentials to rock your kitchen! knowing your ingredients and how to substitute makes cooking fun and creative.
Plus, all the wisdom just prepares you for the real show—the cooking!
With all that said, let’s step into the instructions for those delightful nutty energy balls ! no need for heat here; just some mixing and rolling, and you’ll have a snack ready to fuel your adventures.
Get excited because healthy snacking has never been this easy!
Cooking Like a Pro: Your Guide to Professional Techniques
Hey there, kitchen warriors! if you’re keen on stepping up your cooking game, you’ve landed in the right spot. today, we’re diving into the world of professional cooking methods .
Think of it as giving your meals a bit of a masterclass vibe. let’s break it down into digestible chunks, shall we?
Essential Preparation Steps
First things first, before you even chop a veggie or reach for that spice jar, you need to nail down mise en place .
This fancy french term just means “everything in its place.” get out all your ingredients and tools beforehand. trust me, it saves a lot of chaos later—especially when the timer’s ticking!
Now, let’s chat about time management . when cooking, the last thing you want is to be running around like a chicken with its head cut off.
Here’s a pro tip: plan your steps ahead. write down what you need to do and in what order. that’s your roadmap!
Organization is also key. keep your cutting board clear and tidy, and put stuff away as you go. i’ll be real, i used to have a “kitchen hurricane” situation; it wasn’t pretty.
Oh, and don’t forget about safety . always keep sharp objects away from kids, and remember to wash your hands after handling raw ingredients!
Step-by-Step Process
Alright, on to the fun part. Here’s a quick guide with clear steps to ace your cooking.
- Gather your ingredients : Everything from rolled oats for those nutty energy balls to fresh veggies for a Carrot Salad .
- Preheat your oven (if needed): Depending on the recipe, you might want to crank that baby to 350° F .
- Chop/dice/mix : Follow every step closely. Timing is everything! For example, if you're roasting veggies like roasted beets and carrots , they love that warm oven for about 25- 30 minutes until they’re sweet and tender.
- Check temperatures : If you’re cooking meat, that thermometer should read 165° F . Always keep an eye on that!
- Watch the clock : Timing can make or break a dish. Your Burrata Salad will shine if you don’t over- or under-season while it sits.
Expert Techniques
Ready to pull some chef moves? Here are some professional methods to keep your dishes on point.
- A crucial step? Tasting as you go. It’s the best way to adjust seasonings! You’ll avoid that “oops” moment.
- Quality checkpoints involve checking for color and aroma. If that Salad With Burrata is calling you with vibrant colors, you know you’re on the right track.
- Have issues? Don’t panic! If something seems off, troubleshoot. Too salty? Add a pinch of sugar. You could even toss some shredded coconut in there for a delightful balance.
Success Strategies
Let’s wrap it up with some success strategies to keep you in the game.
Don’t make the common mistake of cooking at too high a temperature. it’s a recipe for disaster—literally! instead, focus on low and slow .
It allows flavors to develop beautifully, especially when dealing with flavors like golden beets .
For quality assurance, poke it, taste it, and adjust! like those nutty energy balls? if it’s too dry, add a little more nut butter.
If it’s too sticky, more oats will save the day. plus, if you wanna prepare in advance, whip them up on a sunday and you’ll have a week’s worth of snackers ready!
So there you have it—your guide to cooking like a pro! with a sprinkle of practice and a dash of patience, you’ll be putting out dishes that’ll make even your grandma proud.
Remember, the kitchen is yours, so have fun, experiment, and find joy in every mix!
Oh, and hang tight, because we’re about to dive into some extra tips and tricks that’ll elevate your home cooking even further.
Can’t wait? i know you can’t! let’s get into that juicy additional information next!
A Nutty Adventure: Making Energy Balls at Home
Alright, friends, let’s dive into a world of energy and goodness with these nutty energy balls ! seriously, if you're looking for a quick pick-me-up that won't send your blood sugar on a rollercoaster ride, you’re in the right spot.
These little gems are packed with wholesome ingredients and are so simple to whip up — let's say they take about 45 minutes total.
Yup, you heard that right, including chilling time !
Pro Tips & Secrets for Success
Now, before we get our hands sticky, let me drop some pro tips that i learned the hard way. first, toast those nuts in a pan for a couple of minutes.
It sounds fancy, but it’s just a quick way to enhance flavor. you can totally skip this step if you’re in a hurry, but i promise you won’t regret it!
Another cool thing i do is throw in a scoop of seeds like chia or flax into the mix. it’s a sneaky way to amp up the nutrition without changing the taste.
Plus, they give your energy balls a little crunch that’s just delightful!
Oh, and don’t forget to chill your energy balls in the fridge for at least 30 minutes . trust me, it’s essential for them to hold their shape.
I once skipped this step and ended up with a nutty pancake instead of balls. not exactly what i was going for!
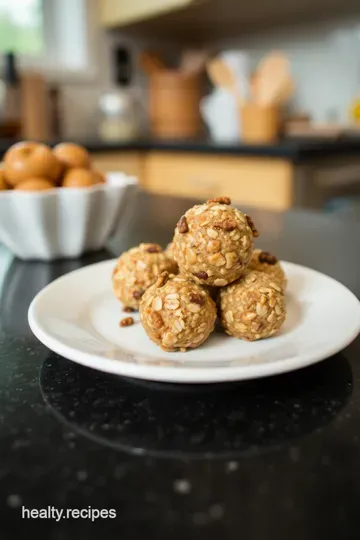
Perfect Presentation
Alright, if you're like me, you want your food to look as good as it tastes. when it comes to plating these nutty energy balls , think fun! maybe stack 'em high on a cute plate or arrange them like a flower — okay, maybe i’m getting a little too carried away.
But honestly? presentation can make a snack feel extra special.
To garnish them, you could shred some coconut or sprinkle a little crushed nut on top. just a tiny pop of color can take these babies to the next level.
Visual appeal is key! think about colorful bowls or pairing them with that beautiful burrata salad you made earlier. total win-win!
Storage & Make-Ahead Magic
Life gets busy, right? if you want to have these guys on hand for those unexpected cravings, store them in an airtight container in the fridge .
They can last up to a week, though they’ll probably be gone way before then. if you want to keep them for longer, you can freeze them in a single layer on a baking sheet, then pop ‘em in a zip-top bag.
Just remember to take them out and thaw them for a few minutes before eating!
Creative Variations: Mix It Up!
Feel free to get wild with flavors! want to make a chocolate cherry version? toss in some dried cherries and cocoa powder.
Or perhaps a pumpkin spice kick? substitute nut butter with pumpkin puree and sprinkle in some pumpkin spice. and hey, if you’re feeling fancy, add a scoop of protein powder for that extra boost post-workout.
You know, the fun part about these energy balls is that they’re totally customizable . if you don’t have almonds, use whatever nuts you have on hand or even golden or red beets to add a healthy sweetness.
This is where your creativity can shine!
A Complete Nutrition Guide
Now, let’s talk numbers! each energy ball packs about 140 calories with 4g of protein and loads of healthy fats.
They’re pretty darn filling too — a perfect snack between meals! if you're managing your diet, just keep an eye on your portion sizes.
Trust me, it’s easy to munch on these without realizing it!
Wrap It Up with a Little Encouragement
So, what do you think? are you ready to dive into the world of nutty energy balls? give them a try, and i promise you’ll be hooked! whether you’re prepping for a busy week or just looking for a delicious pick-me-up, these little bites pack a punch of energy and nutrition.
Plus, they’re a great way to sneak some extra goodness into your day. so roll your sleeves up and get those hands sticky! happy snacking, my friends!
Frequently Asked Questions
What are energy balls made of?
Energy balls are typically made from a mix of rolled oats, nut butter, sweeteners like honey or maple syrup, and additional ingredients such as nuts, seeds, or chocolate. The combination gives them a chewy texture and a delightful taste, making them perfect for a quick snack or energy boost.
How do I store my energy balls?
Store your energy balls in an airtight container in the fridge to keep them fresh. They can last for up to a week. For longer storage, pop them in the freezer, and they should maintain their quality for about a month—just remember to let them thaw before munching!
Can I customize my energy balls?
Absolutely! Energy balls are incredibly versatile. You can mix and match ingredients based on your preferences, such as using dried fruits instead of chocolate chips or adding protein powder for an extra boost. Don’t hesitate to experiment with flavors!
Are energy balls a healthy snack option?
Yes, energy balls can be a very healthy snack option! Packed with whole grains, healthy fats, and protein, they provide a good balance of nutrients. However, like all snacks, moderation is key, so keep an eye on portion sizes if you're watching your calorie intake.
What’s the best way to ensure my energy balls hold their shape?
Chilling your energy balls for at least 30 minutes after rolling them is essential for maintaining their shape. If they’re still too crumbly, try adding a bit more nut butter or honey until the mixture holds together better. Using a mini ice cream scoop can help you form consistent balls too!
Can I make energy balls without nuts?
Certainly! If you're looking for a nut-free option, you can use sunflower seed butter instead of nut butter. Additionally, make sure to choose nut-free ingredients for any mix-ins or toppings. They still pack a nutritional punch and are just as delicious!

Nutty Energy Balls: The Ultimate Healthy Snack Card
⚖️ Ingredients:
- 1 cup (90g) rolled oats
- 1/2 cup (125g) nut butter (e.g., almond butter or peanut butter)
- 1/4 cup (60ml) honey or maple syrup
- 1/2 cup (75g) mixed nuts, chopped (e.g., almonds, walnuts, pecans)
- 1/4 cup (30g) dark chocolate chips (optional)
- 1/4 cup (30g) shredded coconut (optional)
- 1 tsp (5g) vanilla extract
- 1/2 tsp (3g) salt
🥄 Instructions:
- Step 1: In a mixing bowl, combine rolled oats, chopped mixed nuts, and salt.
- Step 2: In a separate bowl, mix together nut butter, honey, vanilla extract, and any optional ingredients like chocolate chips or coconut.
- Step 3: Pour the wet mixture into the dry ingredients. Stir until well combined.
- Step 4: Scoop out tablespoon-sized portions of the mixture and roll them into balls.
- Step 5: Place the energy balls on a lined baking sheet or plate.
- Step 6: Refrigerate for at least 30 minutes to firm up.
- Step 7: Store in an airtight container in the fridge for up to a week.
Previous Recipe: My Favourite Beet Recipes: Vibrant Beetroot and Goat Cheese Salad
Next Recipe: Easy & Delicious: How to Make Kimchi Like a Pro!