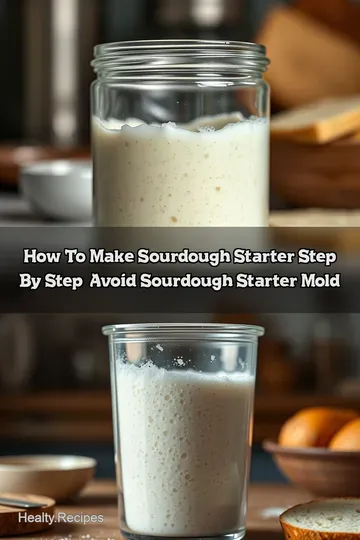
Saving Your Sourdough Starter: How to Identify, Prevent, and Treat Mold
Worried about sourdough starter mold? Learn how to identify, prevent, and safely treat mold with simple sourdough starter steps. Keep your starter lively and fresh!

- Getting Real About Sourdough Starter Mold: My Journey With a Fuzzy Foe
- Starting With History: Where Did This Sourdough Thing Even Come From?
- Why Bother With Sourdough Starter? The Real Perks
- Ready to look into In? Here’s What’s Next
- Essential Ingredients Guide for a Healthy Sourdough Starter Journey
- Mastering the Professional Cooking Method for a Healthy Sourdough Starter
- Insider Tips & Tricks for Your Sourdough Starter Journey
- Make It Look Good: Presentation Tips for Starters & Beyond
- Keeping It Fresh: Storage & Make-Ahead Wisdom
- Remix Your Starter: Creative Twists & Variations
- The Real Deal: Nutrition & Health Benefits
- Wrapping It Up
- Frequently Asked Questions
- Recipe Card
Getting Real About Sourdough Starter Mold: My Journey With a Fuzzy Foe
Okay, picture this: i was all pumped up, ready to bake the best sourdough bread homemade, feeling like some ancient artisan wielding flour and water magic.
I had my sourdough starter bubbling away like a living little pet. then, bam! one day i spot this weird fuzzy patch, kinda greenish-blue, looking all suspicious on my starter’s surface.
I freaked out— is this sourdough starter mold? because honestly, the last thing i wanted was to ruin my whole batch or, worse, make myself sick!
If you’ve ever dabbled in how to make sourdough starter step by step, you know it’s an addictive, slightly mysterious process.
You wake up to a jar that smells tangy and alive. but when mold sneaks in, it feels like betrayal.
So, don’t sweat it if you’re asking yourself what should my sourdough starter look like when things get weird. today, i’ll walk you through recognizing mold, saving your starter, and getting back to that heavenly bread crust.
Starting With History: Where Did This Sourdough Thing Even Come From?
Sourdough starter isn’t some modern fad—it’s been around since ancient times, long before yeast packets popped up in grocery stores.
Early humans caught wild yeast and bacteria floating in the air and captured it in flour and water. this wild culture is what makes sourdough bread unique, with its signature tang and chew.
Today, sourdough is enjoying a huge comeback. everyone’s obsessed with that best sourdough starter and using it to bake homemade loaves boasting crispy crusts and fluffy insides.
While it does take a bit of babysitting—feeding and watching your starter like a tiny pet—it’s actually a pretty straightforward process once you get the hang of how to start sourdough starter easy .
Speaking of which, taking care of your starter and understanding the sourdough starter steps helps you avoid problems like mold.
The whole process is low cost, mostly just flour, water, and some time, and your starter can last forever if you treat it right.
Plus, it gives you enough dough for several loaves without breaking the bank.
Why Bother With Sourdough Starter? The Real Perks
You might wonder, what’s so great about maintaining this living culture? well, for starters, sourdough fermentation improves digestibility. the friendly bacteria lower the bread’s ph and break down gluten proteins a bit, making it easier on your stomach than commercial bread.
And if you look at nutrition, sourdough bread often has a better glycemic index and can preserve nutrients more effectively.
Another cool thing? sourdough starter has that magical tangy aroma and taste you just can’t get from regular yeast. plus, having a healthy starter means you’re ready to whip up fresh bread or even pancakes and pizza dough anytime—think of the perks at brunch or casual friday dinners with friends.
Compared to other bread methods, sourdough’s natural preservation and flavor depth make it a winner. but here’s the catch: you gotta keep it healthy.
That’s where learning to spot and manage sourdough starter mold becomes critical.
Trust me, dealing with mold was my number one challenge starting out. you don’t wanna find fuzzy green blobs in your jar and think you’ve ruined everything.
But, with the right know-how, you can rescue your starter or know when to ditch it and start fresh, without stressing.
Ready to look into In? Here’s What’s Next
I’m about to break down how to create sourdough starter safely, avoid mold growth, and keep your culture alive and kicking.
We’ll go through a simple chart for feeding, signs to watch out for, and easy steps to revive or clean up your starter if things go funky.
Stick around for the ingredients and gear you’ll need. honestly, that starter jar and some flour might look humble, but those little bubbles are the start of something awesome.
Let's get your kitchen smelling like that fresh bakery you love!
Next up: the exact ingredients and tools you’ll want on hand—plus my personal tips that saved my sourdough when mold showed up uninvited. You got this!
Essential Ingredients Guide for a Healthy Sourdough Starter Journey
Alright, let’s get real about creating your best sourdough starter . whether you’re just learning how to start sourdough starter easy or wondering what should my sourdough starter look like , getting your ingredients right is half the battle.
Plus, knowing the signs of trouble like sourdough starter mold keeps your culture happy and your bread dreamy.
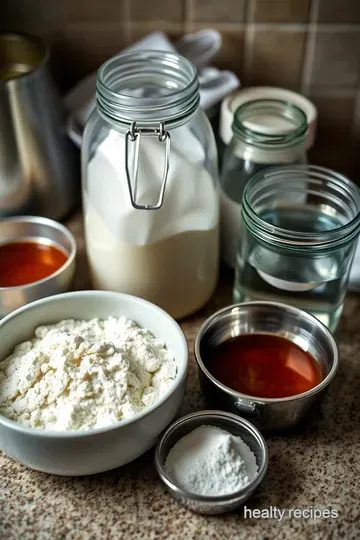
Premium Core Components: The Heart of Your Starter
First things first — your starter needs high-quality flour and clean water . i usually measure out 100 grams (about 3/4 cup) of all-purpose or whole wheat flour and mix with 100 ml (roughly 3.
4 fluid ounces) of lukewarm water. yep, i’m talking about precise, consistent measurements because that’s the secret to how to make sourdough starter step by step without guesswork.
Quality check alert : your flour should be fresh, not stale or clumpy. if it smells off or looks too old, toss it.
And as for water, tap water with chlorine can totally mess with your starter’s vibe, so i usually go filtered or let tap water sit out for hours.
Storage-wise, keep your starter in a clean glass jar with a loose cover . tight lids trap gases and can lead to sourdough starter mold — not what you want.
The starter’s shelf life can last months if fed regularly, but once you see any mold, it’s smarter to ditch it and create sourdough starter fresh again.
Signature Seasoning Blend: A Little Twist to Your Starter?
Now, this part is more about the bread , but hey — sometimes i get curious and stir in herbs or spices once the starter’s lively, just for fun.
For your basic starter, the real magic happens with the yeast and bacteria , so keep it simple.
But if you want to play with flavors, think about:
- Essential spice combos: Ground cinnamon, nutmeg
- Herb pairings: Rosemary or thyme blend into your final bread dough
- Aromatics: A little garlic powder or onion flakes can give tangy bread a twist
- Regional alternatives: In some cultures, rice flour or rye flour create unique starters with tangier profiles.
But as a beginner, focus on keeping your starter pure. It’s way easier—and safer—to spot signs of damage, like that dreaded mold .
Smart Substitutions: When Life Throws You Curveballs
Okay, so I remember this one time when I ran out of all-purpose flour. Panicked? Absolutely. But guess what? I swapped in rye flour, and boom, the starter was stronger than before! So here are some quick hacks:
- Common alternatives: Whole wheat or rye flour can replace all-purpose
- Diet tweaks: Gluten-free folks can try brown rice or sorghum flour starters, though they behave differently
- Emergency substitutes: A dash of honey or sugar jumpstarts sluggish starters, especially if your culture looks like it’s on life support
- Seasonal options: In winter, warmer water helps keep your starter bubbly; summer? Use cooler water to avoid over-fermentation.
Trust me, this stuff saved me. But be cautious—substitutions might change your fermentation time or flavor intensity.
Kitchen Equipment Essentials: Your Starter’s Best Friends
Let’s chat tools. I’m old school but precise. Here’s what’s needed:
- A transparent glass container (about 1 liter)
- A digital kitchen scale — no eyeballing here, exact measurements matter
- A spatula or wooden spoon (metal can be a bit harsh on your starter’s delicate yeast)
- Optional but nice: a thermometer to keep water at about 75° F ( 24° C) , perfect for waking up your starter.
Got no glass jar? no problem! clean plastic food storage containers can do the trick, just make sure they’re food-grade and spotless.
Storing utensils separately and washing hands before handling your starter helps avoid mold issues.
Honestly, maintaining a sourdough starter is part science, part art . i remember waking up to see weird fuzzy patches — yep, that dreaded sourdough starter mold —and feeling totally bummed.
But with patience and these tips, you learn to catch issues early. plus, the joy of baking fresh sourdough bread homemade? priceless.
Ready for the fun part? let’s jump into the sourdough starter steps next — feeding schedules, spotting that perfect bubbly rise, and baking your first loaf.
Trust me, your taste buds will thank you!
Mastering the Professional Cooking Method for a Healthy Sourdough Starter
Alright, friends, let's get real about the professional way to handle your sourdough starter, especially when you’re on the lookout for that pesky sourdough starter mold .
I've had my fair share of mold disasters — trust me, it ain't pretty and smells worse. but with the right steps, you can keep your starter healthy and your breads tasting just right.
Essential Prep: The Mise en Place of Starter Care
Think of your sourdough starter like a pet. you gotta prep the space, gear, and ingredients. lay everything out — clean glass jar, kitchen scale, fresh flour, filtered lukewarm water (around 75° f / 24° c ), and a spoon that’s not made of metal (metal can freak out your precious bacteria).
One time, i just winged it — no scale, no notes — and ended up dumping a whole batch because i missed signs of mold.
Lesson learned: scale that flour and water perfectly every single time. don’t skip it!
For time management, treat your starter like a 24/7 gig. you might feed it twice a day if it's super active .
Mark your jar with a rubber band to track rising times — honestly, this simple trick saved me so many times from guessing.
Organization is key: keep your starter in a clean, draft-free spot at about 70° f to 75° f . cooler temps slow down fermentation, and hotter? you risk speeding into mold city.
Safety first, folks! Mold means toss the contaminated parts ASAP (yep, even if it’s just the top layer). It’s not worth risky bacteria lurking in your mix.
Step-by-Step to a Mold-Free, Bubbly Starter
- Inspect your starter daily for any weird fuzz or odd colors like green, blue, or black . That’s a big no-no sign of sourdough starter mold.
- Smell test: It should smell pleasantly sour or yeasty. If it smells downright rotten or sharp? Time to throw out a portion or whole batch.
- Remove moldy parts immediately , cutting off ½ inch or so of the top. Sometimes it’s just the surface, but if you see a lot, consider ditching it.
- Clean your container thoroughly with hot soapy water, rinse well, then wipe with vinegar or a food-safe sanitizer.
- Refresh your starter by adding equal parts flour and lukewarm water ( like 100g / 100ml ), mixing smooth, and covering loosely.
- Feed regularly every 12 to 24 hours , keeping your measurements consistent. The goal: bubbles, rising, a lively starter that smells alive.
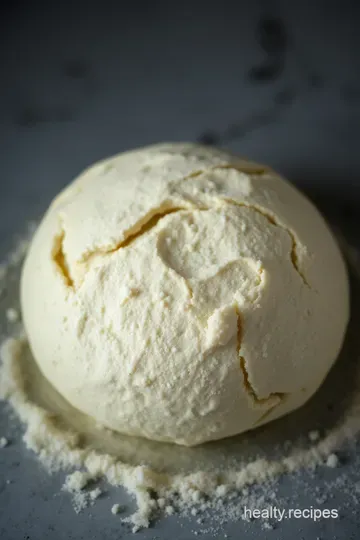
Visual cues matter — your starter should double in size in about 6 to 8 hours after feeding. If it stays flat, a little sluggish, or smells off, you gotta troubleshoot.
Expert Techniques That Actually Work
Now, here’s where it gets fun! Pro bakers swear by these critical steps:
- Use rye or whole wheat flour for a punchier starter. It ferments faster and fights off mold better.
- Water temperature is king. Too cold, and your starter sulks. Around 75° F is pure magic.
- Keep your container loosely covered – I prefer a coffee filter tied with a rubber band over a tight lid. It lets your microbes breathe but keeps dust and unwanted spores out.
One glitch i often ran into? starter starting to separate with a brownish liquid on top (called hooch). it’s a sign your starter needs feeding, not mold.
Just pour off the hooch, feed, and get back on track.
How to Win Every Time: Success Strategies
First, don’t get lazy. feeding your starter on time is the number one trick to avoid sourdough starter mold . common pitfalls include feeding with chlorinated tap water or letting your starter go too long without a refresh.
Want perfect sourdough starter steps? Keep everything measured and consistent. Use a scale , not cups—that’s pro advice right there.
If you want to get ahead and prep for the week, make a larger batch and keep it refrigerated with weekly feedings.
Just remember to take it out and feed for at least 3-4 days before baking. your starter needs to wake up to get bubbly and lively.
Honestly, I’ve revived starters that looked hopeless because I followed these exact expert moves.
So the next time you see suspicious colors creeping on your jar or wonder, “ What should my sourdough starter look like ?" — think about this guide and react fast.
Alright, now that you’ve got the pro method down for avoiding sourdough starter mold and keeping your culture thriving, let's dive into some more juicy additional information that will help you nail every loaf and keep your starter happy for the long haul.
Insider Tips & Tricks for Your Sourdough Starter Journey
Alright, let me spill some real tea on sourdough starters. honestly, when i first tried to create sourdough starter at home, i was super intimidated.
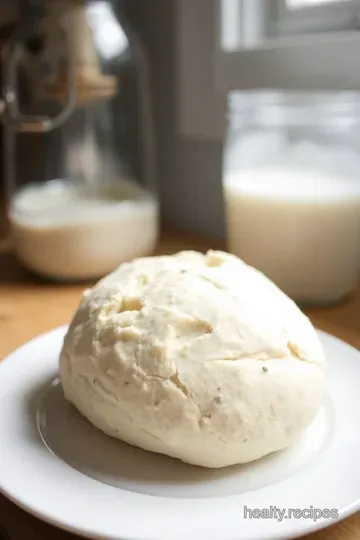
I kept asking myself, “what should my sourdough starter look like?” spoiler: it's a bubbly, slightly tangy-smelling goo, not some moldy frankenstein monster.
Speaking of which— sourdough starter mold is every newbie baker’s nightmare. if you spot any fuzzy green, black, or blue patches, don’t mess around! mold is a big no-go.
I learned this the hard way after trying to “rescue” a starter i should have just tossed. always scoop off at least the top 1-2 cm if mold appears or, if it’s bad, chuck it.
Your gut (and baking results) will thank you.
One quick time saver i swear by: use a digital kitchen scale to measure your flour and water precisely. it saves so much guesswork when following the sourdough starter steps .
Also, keep your water around 75° f —too cold and your starter might sulk, too warm and it could invite unwanted bacteria.
Here’s a little flavor bomb too: adding a tiny bit of sugar or honey in the first feed can wake the yeast up faster, especially if you’re trying to start sourdough starter easy .
You’re basically giving your starter a little espresso shot.
Make It Look Good: Presentation Tips for Starters & Beyond
Okay, i know that beauty might not be first on your mind with a starter—but trust me, presentation actually matters! i learned this after years of hiding my weird, bubbly jars in the back of my fridge.
When you keep your starter in a clean, transparent container , you get to watch those wild bubbles rise and fall like edible art.
Try marking the jar with a rubber band at the level of your starter after feeding. it's such a zen little moment to watch it double or triple in size.
Plus, when you get your sourdough bread homemade , consider plating slices with fresh butter, a sprinkle of flaky salt, or even fresh herbs like rosemary.
The rustic vibe is chef’s kiss .
Adding colorful garnishes—like vibrant olives, sun-dried tomatoes, or even a drizzle of honey—can turn a simple slice into a whole experience.
I’m all about those color combos. browns, bright greens, and yellows? magical together.
Keeping It Fresh: Storage & Make-Ahead Wisdom
When dealing with starters, storage is major . i’ve lost more starters than i care to admit because of neglect or poor storage.
Pro tip: feed your starter regularly—every 12- 24 hours if kept at room temp. if you’re gonna be mia, fridge storage is your best friend but feed before and feed after chilling to keep it lively.
If mold sneaks in despite your efforts, toss that batch. No second chances here! Also, feed your starter with filtered or bottled water to avoid chlorine, which can kill the good bacteria.
When reheating your dough or baked bread made from your starter, pop it in a 350° f oven for 5- 10 minutes to refresh that crust and bring back the aroma.
Trust me—it’s like magic.
Remix Your Starter: Creative Twists & Variations
One of the coolest things? you can totally customize your starter. move beyond just plain all-purpose flour—try rye or whole wheat flours to boost flavor and activity.
Want to get seasonal? add a teaspoon of cinnamon or nutmeg in your starter feeding during autumn for that cozy vibe.
For my gluten-sensitive pals wanting to jump in, brown rice flour starters can be a good substitute. it’s a little different, but you can create sourdough starter without wheat fuss.
Also, regional variations matter—a traditional san francisco starter has a tangiering tang because of local wild yeasts. sometimes that local flair is exactly what takes your baking to the next level.
The Real Deal: Nutrition & Health Benefits
Here’s something most don’t know right away: sourdough bread made from a healthy starter is better for you than standard bread.
The slow fermentation breaks down gluten and phytic acid, making it easier to digest. plus, you get that natural probiotic benefit from the lactic acid bacteria (win-win).
Portion-wise, one slice of homemade sourdough bread is roughly 80-100 calories but packs nutrition—like b vitamins and minerals—way richer than your supermarket loaf.
So, eating a moderate slice daily can be part of a balanced diet.
Wrapping It Up
Navigating the world of starters can feel like decoding top-secret recipes. but once you get the hang of how to make sourdough starter step by step , avoiding pitfalls like sourdough starter mold , you’re set for endless baking fun.
Honestly, the best part is watching that bubbly little starter grow from nothing into the heart of your kitchen magic.
Don’t sweat the mistakes—they’re part of the adventure. just keep feeding, observing, and sharing your sourdough stories. your future self (and your taste buds) will thank you big time.
Try it out—you got this!
Frequently Asked Questions
How can I tell if my sourdough starter has mold or if it's just harmless hooch?
Great question! Mold on a sourdough starter typically appears as fuzzy patches in colors like green, blue, black, or white. Hooch, on the other hand, is a thin layer of liquid on top that’s usually gray or brown and is safe to stir back in or pour off. If you see any fuzzy, discoloured spots, it’s best to discard the affected portion to keep your starter safe and healthy.
What should I do if I actually find sourdough starter mold on my culture?
If you spot sourdough starter mold, carefully scoop off at least 1-2 cm of the top layer where the mold resides—avoid scraping deeper. If the mold is widespread or the starter smells unpleasantly sour or rotten, it's safest to discard the whole batch and start fresh. Remember, safety first: mold can produce harmful toxins even if you don’t see it everywhere.
How can I prevent mold from growing on my sourdough starter in the future?
Prevention is all about good hygiene and regular feeding. Keep your starter in a clean container, cover it loosely to allow airflow, and feed it consistently—usually once or twice a day at room temperature. Maintaining a steady environment around 70–75°F (21–24°C) helps the good yeast and bacteria thrive, keeping mold at bay. And always use clean utensils and hands to avoid contamination.
Can I revive a starter after removing mold, or do I need to start from scratch?
Often, you can rescue your starter by discarding moldy parts and feeding the remaining healthy portion with fresh flour and water. With regular feeding over about a week, your starter should bounce back and become bubbly and active again. However, if mold was extensive or the smell is off, starting with a fresh culture is the safest bet.
Are there any flour or water types that help reduce sourdough starter mold risk?
Using whole grain flours like rye or whole wheat can encourage robust fermentation and outcompete mold. Also, filtered or bottled water is better than chlorinated tap water, which can harm your starter’s natural microbes. Some bakers add a small amount of sugar or honey to jump-start fermentation, but if mold is a persistent problem, focusing on cleanliness and feeding routines matters most.
Is there any nutritional impact if my starter had mold but I removed it before baking?
Once mold is removed and the starter is healthy again, there’s no nutritional downside to your sourdough bread. The starter itself mainly contributes to flavor and natural leavening. Just ensure no mold remains, because mold toxins won’t bake out safely. A clean, lively starter leads to that classic tang and chewy crumb we all love!
Saving Your Sourdough Starter: How to Identify, Prevent, and Treat Mold Card
⚖️ Ingredients:
- 100g (3/4 cup) all-purpose flour or whole wheat flour
- 100ml (3.4 fl oz) lukewarm water (around 75°F / 24°C recommended)
- 1 tablespoon sugar or honey (optional, to jump-start fermentation)
- Clean container (glass or food-grade plastic, at least 1L capacity)
- White vinegar or food-safe sanitizer
- Clean cloth or paper towel
🥄 Instructions:
- Step 1: Inspect your starter carefully. Check the surface for unusual colors such as green, blue, or black molds or fuzzy spots. Smell it—sour, yeasty scents are normal; rotten or sharp smells indicate mold.
- Step 2: Remove moldy starter by discarding the top 1 to 2 cm of the starter carefully to avoid cross-contamination. For severe mold or off smells, discard the entire batch.
- Step 3: Clean the container thoroughly with hot, soapy water and rinse well. Wipe the inside with a kitchen-safe sanitizer or vinegar solution.
- Step 4: Refresh your starter by adding fresh flour and lukewarm water to the remaining healthy portion. Mix well until smooth, cover loosely, and ferment at room temperature around 70°F (21°C).
- Step 5: Feed your starter 1-2 times daily, maintaining equal parts flour and water by weight. Watch for bubbles and rising activity indicating healthy fermentation.
- Step 6: Prevent mold in the future by storing the starter in a clean container with good airflow or loosely covered. Feed regularly and avoid contamination using clean utensils and hands.
Previous Recipe: Bright & Healthy romaine hearts nutrition: Easy Salad with Fresh Flavor
Next Recipe: Crisp & Tangy Pickled Fresnos: My Easy Homemade Spicy Peppers