Savory Rustic Vegetable Galette: A Free-Form Delight
Discover my favorite Rustic Vegetable Galette recipe! Packed with seasonal veggies, it's perfect for any gathering or picnic. Your new go-to dish awaits!

- Welcome to the World of Gallette
- What’s This Galette All About?
- Why You’ll Love This Rustic Galette
- Ready to Get Cooking?
- The Essential Ingredients Guide: Your Delicious Journey Begins
- Mastering the Art of Cooking: The Professional Method
- Additional Recipe Information for Your Rustic Vegetable Galette
- Frequently Asked Questions
- Recipe Card
Welcome to the World of Gallette
Have you ever stood in front of your fridge, staring at odds and ends from last week’s grocery run, and thought, “what on earth can i make with this?” oh man, i’ve been there! one day, after a minor refrigerator rebellion, i whipped up a rustic galette that turned those forgotten veggies into a savory masterpiece.
I know it sounds fancy, but trust me, this free-form french pastry is as uncomplicated as pie! and that’s exactly what makes it so delightful.
What’s This Galette All About?
So, let’s dive a little deeper into the world of galettes . traditionally, this french savory pastry is all about simplicity.
Originating from the brittany region, where rustic cooking reigns supreme, it’s a dish made for those who love fresh ingredients and straightforward cooking.
Nowadays, it's gained a ton of popularity, popping up at farmers’ markets, trendy cafes, and even home dinner tables, proving that classic recipes can still be modern and tasty.
Making a rustic vegetable galette is simple, with a prep time of just about 25 minutes—add another 30 to chill the dough.
Pop it in the oven for 35- 40 minutes, and voilà! a delicious centerpiece is born. it serves six folks, but hey, if you're hungry, who's judging?
And let’s talk cost. you can whip up this dish without breaking the bank. all those seasonal veggies? they’re often on sale.
Plus, you can use leftover bits from other meals! it’s a win-win for your wallet and your taste buds.
Why You’ll Love This Rustic Galette
Now let’s highlight some fantastic benefits. first off, it’s healthy ! packed with seasonal vegetables like bell peppers and zucchini, you’re not just filling your belly; you’re nourishing your body.
It’s like a savory hug on a plate!
Imagine serving this galette at a picnic or gathering. everyone will dig it—trust me. the flaky pastry crust is to die for, and if you layer it with roasted vegetables and a sprinkle of herbs, it’s a show-stopper.
Plus, it's super versatile. you can jazz it up with cheesy galette options , or go bold with a mediterranean vegetable galette .
The choice is yours!
And let’s not forget how appealing it is for special occasions. whether you're hosting an intimate dinner or planning a festive gathering, serving a galette adds a touch of french flair without any fuss.
Ready to Get Cooking?
Alright, are you ready to grab your rolling pin and recreate this masterpiece? next up, we’ll dive into the ingredient list and how to make this heavenly savory galette happen.
From crafting a flaky pastry crust to picking the perfect vegetable galette filling , you'll find this process a breeze.
I promise it's an easy galette with instructions that even a beginner can follow. so, let’s get rolling!
The Essential Ingredients Guide: Your Delicious Journey Begins
Cooking should be fun, right? like, who doesn’t love gathering around good food? if you’re diving into the world of rustic galettes or any dish, knowing your ingredients is key.
Let’s break it down with some major components, seasoning, smart substitutions, and all those must-have tools!
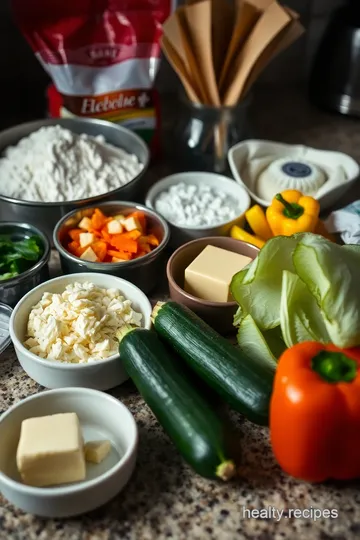
Premium Core Components
Let’s kick things off with the foundational ingredients . when you’re whipping up a galette (which, honestly, is a french savory pastry that feels fancy but is super easy), it’s crucial to pick quality ingredients.
- Flour : Use 1 ½ cups (190g) of all-purpose flour. Look for something finely milled; it makes a big difference!
- Butter : Go for ½ cup (113g) of unsalted butter. Cold butter is key for that flaky pastry crust we love.
- Natural Indicators : Fresh produce should look vibrant and feel firm. For veggies, like zucchini and bell peppers, skip the soft or bruised ones—you’re aiming for that picture-perfect filling .
Storage Tips
Most pantry staples can last for months if stored properly. keep flour in a cool, dark place, and your butter in the fridge.
Fresh veggies? they usually last about a week in your crisper drawer. but here’s a pro tip: if any of your veggies are on their last legs, toss them in your galette for a delicious way to use them up!
Signature Seasoning Blend
Now, let’s jazz it up with flavors. The right spices can kick your galette to the next level!
- Essential Spice Combinations : Think thyme for that earthy aroma. A little goes a long way!
- Herbs and Aromatics : Fresh herbs like basil or parsley can be delightful. Pair with garlic? Yes, please!
Smart Substitutions
Life happens, and that’s where smart substitutions come into play.
- Don’t have buttermilk? Use plain yogurt !
- For a vegan galette , swap out butter for coconut oil or vegan margarine. Your friends will wonder how you made that flaky crust without using animal products.
Seasonal Options
Seasonal veggies—like zucchini, bell peppers, and tomatoes—are not just tasty but can also change up your galette game. Get creative and use what’s fresh at the market!
Kitchen Equipment Essentials
Oh boy! The right tools can make or break your cooking experience.
-
Must-Have Tools : A good mixing bowl and rolling pin are non-negotiable. You can’t make a rustic galette without a rolling pin, folks!
-
Storage Solutions : Keep all your baking bits together to avoid the panicking “where did I put that” routine. A dedicated baking drawer can save you some serious kitchen stress.
Let's Get to Cooking!
With all this info, you’re set to make culinary magic. now, when you’re ready to bring this savory galette to life, grab that dough! just imagine the flaky pastry crust encasing all those seasonal veggies, drizzled with olive oil and smothered in cheese.
It’s gonna be chef’s kiss on instagram, trust me.
So, how do you make it? hit that next section to get the easy galette instructions! you won’t want to miss out on bringing this dish to your table, and i promise it’s more straightforward than it sounds.
😍

Mastering the Art of Cooking: The Professional Method
When it comes to cooking like a pro, it's not just about the ingredients — it's about how you handle them.
The secret lies in the professional cooking method , which focuses on preparation, timing, and organization. so buckle up, because we’re diving into some essentials that will make your next rustic galette shine!
Essential Preparation Steps
Mise en place is a fancy french term that means “everything in its place.” seriously, it’s like the holy grail of cooking! before you start whipping up that savory galette, chop all your veggies, measure your flour, and have everything ready to go.
This means when you start cooking, you're not frantically searching for that garlic powder — you’re zen and ready!
Now, let’s chat about time management . you know how it feels when your galette is in the oven, and you suddenly have a mountain of dirty dishes staring at you? set a timer for everything.
Prep your filling while your dough is chilling in the fridge. multitasking is your friend. just keep an eye on the clock!
Organization strategies come into play, too. use separate bowls for each ingredient, especially for your colorful vegetable galette filling. it makes things easier to mix and toss together later.
Trust me; you’ll feel like a chef in a cooking show!
Oops! safety first! make sure your workspace is clean and your knives are sharp. always use oven mitts when pulling out that golden-brown galette.
Nobody wants a burnt hand along with their dinner, right?
Step-by-Step Process
Now, let’s get into the nitty-gritty with some clear, numbered instructions .
-
Make the dough by combining flour and salt, then cutting in your butter until it looks like coarse crumbs. gradually add in the ice water until it holds together, then chill for 30 minutes .
-
Preheat your oven to 400° F (that's 200° C if you’re feeling international today!).
-
Roll out your dough on a floured surface until it's a gorgeous 12-inch circle . Transfer it onto a baking sheet.
-
Layer that flaky pastry crust with cheese, leaving some space around the edges for that rustic look.
-
Toss your chopped seasonal veggies — think zucchini, bell peppers, or whatever's fresh — in a bowl and spread them over your cheese. Fold those edges over, creating pretty pleats.
-
Bake for 35- 40 minutes , until it’s a lovely golden brown. Grab your mitts; it’s almost time to eat!
Expert Techniques
Getting those professional methods down can change the game. a critical step is to control temperature — both for your filling (roasted veggies really take it up a notch) and the oven.
The last thing you want is soggy pastry.
And don’t skip the quality checkpoints ! check your dough’s texture; it should feel smooth, not sticky. before you toss that galette into the oven, why not give it a quick egg wash ? it’ll give you that beautiful glossy finish.
If things go awry (we've all been there!), don’t sweat it. if your crust is too thick, just use a sharp knife to trim it before baking.
And if you forgot to adjust the seasoning? add a sprinkle of salt right before serving.
Success Strategies
Let’s avoid those common mistakes! First, don’t overwork your dough ; it’ll come out tough, and nobody wants a chewy galette!
Also, get creative with your filling. We all have leftover veggies ; make a cheesy zucchini galette or a Mediterranean vegetable galette. Use whatever you’ve got!
If you want to plan ahead, whip up that homemade pastry dough days in advance. Just keep it in the fridge and take it out when you’re ready.
Oh, and remember: this galette doesn't just have to be a side dish. It makes a fabulous main course, especially if you pair it with a refreshing salad .
So there you go, folks! With these tips and techniques, you’ll never have a sad dinner again. In this busy world, who wouldn’t love a quick yet sophisticated meal that impresses?
Stay tuned for more additional information on perfecting your cooking skills. Cheers to rustically delicious meals and good vibes in the kitchen!

Additional Recipe Information for Your Rustic Vegetable Galette
When you dive into the rustic vegetable galette world, you're not just making a dish; you're unleashing a whole vibe! let’s break it down so you can impress everyone—whether you're sharing a meal at home or packing this up for a picnic.
Pro Tips & Secrets
Chef's personal insights
oh my gosh, i cannot stress enough how much cold butter is key for that perfect flaky pastry crust.
Seriously, it’s like the secret handshake for a successful galette!
Time-saving techniques
now, if you’re crunched for time, go for store-bought pastry dough. we get it; life’s busy! but if you’ve got a few extra minutes, homemade pastry dough always wins my heart.
Flavor enhancement tips
to really jazz up your vegetable galette filling , toss in a pinch of garlic powder or some good ol’ fresh herbs.
Thyme, rosemary, or even basil can do wonders. you’ll be like “wow, did i just make a michelin-star dish?”
Presentation advice
don’t shy away from presentation! giving a sprinkle of fresh herbs or some vibrant microgreens on top before serving can make all the difference.
Trust me, it turns a humble galette into something outta a cooking magazine!
Perfect Presentation
Plating Techniques
For a rustic look, just slide that beauty onto a wooden cutting board. Pair it with a bright salad or crunchy veggies on the side, and boom—a feast for the eyes!
Garnish Ideas
A generous drizzle of balsamic reduction or a few cherry tomatoes can really elevate this dish. Just a little something to make it pop!
Color Combinations
Utilize those seasonal vegetables! Vibrant bell peppers, deep green zucchini, and bright cherry tomatoes create a stunning color contrast. It’s a rainbow on a plate!
Visual Appeal Tips
Cut your galette into slices and arrange them fanned out on the platter. Trust me, it'll make your rustic tart recipe look fancy with zero extra effort!
Storage & Make-Ahead
Storage Guidelines
You can totally keep leftovers in the fridge for about 3-4 days . Just cover it tightly to prevent it from drying out.
Preservation methods
freezing is an option too! just pop your fully baked galette into the freezer. when guests come calling or you just need a quick meal, heat that baby up even from frozen.
Reheating Instructions
To reheat, place it in a preheated oven at 350° F ( 175° C) for about 15- 20 minutes. It'll be like you just baked it fresh.
Freshness Duration
Honestly, it tastes best fresh, but trust me, the flavor still shines, even a couple of days later!
Creative Variations
Flavor Adaptations
Feeling adventurous? Try a Mediterranean vegetable galette with olives and feta. Change up the cheese for some easy cheesy galette options—imagine ooey-gooey mozzarella melting with fresh tomatoes!
Dietary Modifications
For gluten-free folks, just swap the flour with a gluten-free blend. And if you’re all about that plant-based life, go for vegan galette recipes, which are equally delicious!
Seasonal Twists
Use what’s in season! In the summer, load it up with heirloom tomatoes and caprese flavors. In fall, go with squash and sage—a total cozy mood!
Regional Variations
Regional galette variations are fantastic, too! A southern-inspired one could blend in collard greens and a spicy kick. Honestly, the options are endless!
Complete Nutrition Guide
Detailed Breakdown
Each slice of your galette is roughly 250 calories but packed with goodness! It’s a healthy choice that doesn’t skimp on flavor. So, you can enjoy it guilt-free.
Health Benefits
Loaded with colorful veggies means you’re getting vitamins and minerals aplenty. Plus, that flaky pastry crust deserves some love (in moderation, of course)!
Dietary Considerations
This dish offers flexibility! Whether you’re vegetarian, gluten-free, or just looking for healthy vegetable recipes, you can make it work.
Portion Guidance
Serving sizes may vary, but cutting one galette into 6 slices should satisfy. Pair it with a light salad for a hearty meal without overdoing it!
In conclusion, making this savory galette is such a delightful experience, let alone the joy it'll bring to your taste buds.
With my tips, you’ll master the art of creating flaky crusts and flavorful fillings in no time. so, roll up those sleeves, throw on your apron, and enjoy the process.
Trust me, you’ll be a galette-making pro before you know it! happy cooking!
Frequently Asked Questions
What is a galette, and how is it different from a regular pie?
A galette is a free-form French pastry that can be either sweet or savory, distinguished by its rustic appearance and flexible crust. Unlike traditional pies that have a structured pan, a galette's dough is rolled out flat and wrapped loosely around the filling, creating a more casual and homey presentation.
Can I make the galette dough ahead of time?
Yes! You can prepare the galette dough a day in advance. Just wrap it tightly in plastic and store it in the refrigerator to chill, making assembly quicker and easier on the day you plan to serve.
What kinds of vegetables work best for the galette filling?
For the galette filling, seasonal vegetables are best. Zucchini, bell peppers, cherry tomatoes, and red onions all work well, but feel free to experiment with whatever is fresh, such as mushrooms, spinach, or even root vegetables like sweet potatoes.
How do I store leftover galette, and how long does it last?
Store any leftover galette in an airtight container in the refrigerator for up to 3 days. To reheat, place it in the oven at 350°F (175°C) for about 10-15 minutes until warmed through to maintain the crust's flakiness.
Can I make the galette vegan-friendly?
Absolutely! To make a vegan galette, swap out the butter in the dough for vegan butter or coconut oil, and use a plant-based milk instead of the egg wash on the crust. Additionally, you can substitute cheese with a dairy-free cheese option or omit it entirely for a lighter version.
How can I enhance the flavor of my galette filling?
Enhance the flavor of your galette filling by seasoning it well with salt, pepper, and fresh herbs like thyme, basil, or oregano. Sautéing the vegetables lightly before assembling can also deepen their flavor and add a delightful texture contrast.
Savory Rustic Vegetable Galette: A Free-Form Delight Card

⚖️ Ingredients:
- 1 ½ cups (190g) all-purpose flour
- ½ teaspoon salt
- ½ cup (113g) unsalted butter, chilled and diced
- 4-5 tablespoons (60-75ml) ice water
- 1 cup (150g) zucchini, thinly sliced
- 1 cup (150g) bell peppers, diced (any color)
- 1 cup (150g) cherry tomatoes, halved
- ½ cup (75g) red onion, thinly sliced
- 1 teaspoon fresh thyme leaves (or ½ teaspoon dried thyme)
- Salt and pepper to taste
- 1 cup (100g) shredded cheese (such as Gruyère or mozzarella)
- 1 large egg (for egg wash)
- 1 tablespoon (15ml) olive oil (for drizzling)
🥄 Instructions:
- Step 1: In a mixing bowl, combine flour and salt.
- Step 2: Add diced butter and mix until the texture resembles coarse crumbs.
- Step 3: Gradually add ice water until the dough holds together.
- Step 4: Form the dough into a disk, wrap in plastic, and chill for 30 minutes.
- Step 5: In a bowl, combine zucchini, bell peppers, cherry tomatoes, red onion, thyme, salt, and pepper.
- Step 6: Toss to combine and set aside.
- Step 7: Preheat the oven to 400°F (200°C).
- Step 8: Roll out the chilled dough on a floured surface into a circle about 12 inches (30 cm) in diameter.
- Step 9: Transfer the dough to a parchment-lined baking sheet.
- Step 10: Spread shredded cheese over the dough, leaving a 2-inch (5 cm) border.
- Step 11: Arrange the vegetable filling evenly over the cheese.
- Step 12: Fold the edges of the dough over the filling, pleating as needed.
- Step 13: Beat the egg and brush it over the exposed dough.
- Step 14: Drizzle olive oil over the vegetables.
- Step 15: Bake in the preheated oven for 35-40 minutes, or until the crust is golden brown.
- Step 16: Let cool slightly before slicing and serving warm or at room temperature.
Previous Recipe: Wednesday Sauce: Elevate Your Midweek Dinners with This Easy Recipe
Next Recipe: Classic Gooey Butter Cake with a Vanilla Twist - Easy & Delicious Recipe